Pre-Assembly Preparation Operations in Outsole Manufacturing
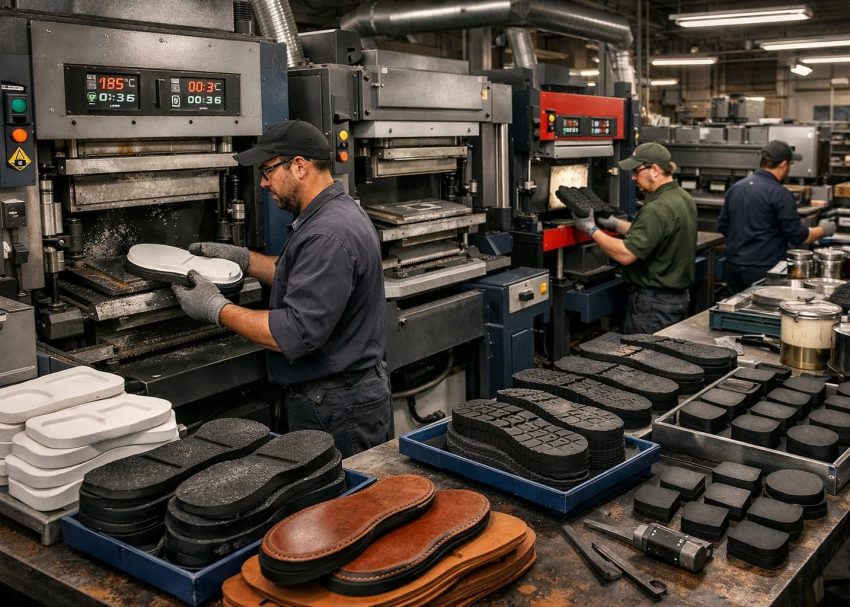
After materials have been received, inspected, cut, leveled, colored, and polished, the outsole components move into a series of specialized preparation operations. These operations are designed to prepare the components for assembly, improve bonding performance, create decorative effects, and achieve the final design requirements specified by the customer.
Not every outsole passes through every operation described below. The exact process flow depends on the construction type, material combination, product category, and customer specifications. However, most footwear factories utilize many of these processes in some form before stock fitting assembly begins.

Milling and Digging Operations
Milling, sometimes referred to as digging, is a material removal process used primarily on leather blockers, synthetic blockers, and certain outsole components. Material is selectively removed from specific areas to create cavities, reduce thickness, accommodate inserts, or prepare components for moulding operations.
In modern factories, CNC milling systems are commonly used because they provide excellent precision and repeatability. By removing material only where necessary, manufacturers can achieve complex outsole designs while maintaining dimensional accuracy. Milling is particularly important when producing multi-component outsoles that require precise fitment between midsoles, heels, inserts, and decorative components.
Machines Used
- CNC Milling Machine
- CNC Router
- Specialized Sole Milling Machine
Applications
- Injection mould preparation
- Insert accommodation
- Weight reduction
- Component fitment
Common Defects
- Excessive material removal
- Uneven milling depth
- Surface damage
- Incorrect cavity dimensions
Key Control Points
- Milling depth verification
- CNC program validation
- Tool wear monitoring
- Component positioning accuracy
Expert Tip: Validate mould quality before bulk production.

Outsole Moulding Operations
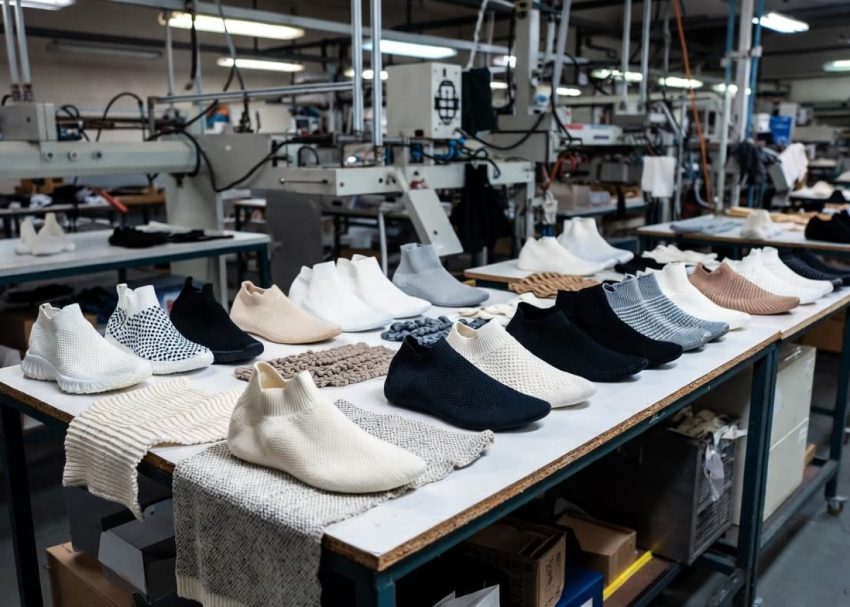
Moulding is one of the most important manufacturing stages in outsole production. During this process, raw materials are converted into finished outsole components using heat, pressure, and specialized mould systems.
Different moulding technologies are used depending on the material and construction requirements. A single footwear product may contain several individually moulded components that are later assembled together.
The quality achieved during moulding directly affects appearance, dimensional accuracy, durability, flexibility, and assembly performance.
Consequently, mould maintenance and process control are critical factors in outsole manufacturing. Outsole moulding itself is a vast subject and will be explored in detail throughout a dedicated Outsole Moulding Series.
Components Commonly Moulded
- Unit Outsoles
- Midsoles
- Heels
- Wedges
- Welts
- Shanks
- Inserts
- Veneers
Common Moulding Technologies
- Compression & Injection Moulding
- Direct Injection Moulding
- PU Injection & EVA Compression Moulding
Common Defects
- Short mould, Flash
- Air traps, Sink marks
- Dimensional variation
Key Control Points
- Temperature control
- Pressure control
- Cycle time monitoring
- Mould condition verification
Pro Tip: Never skip roughing validation trials.
Trimming Operations
Following moulding, outsole components often contain excess material known as flash. Trimming removes this unwanted material and brings the component to its final shape and dimensions.
Trimming quality significantly affects both appearance and assembly accuracy. Poor trimming can create visible edge defects, dimensional inconsistencies, and difficulties during stock fitting. Depending on material thickness and softness, factories may trim one, two, or even three pairs simultaneously to improve productivity.
Machines Used
- High-Speed Trimming Machine
- Sole Trimming Machine
- Band Knife Trimmer
Benefits
- Improved appearance
- Accurate dimensions
- Better assembly fit
- Reduced rejection
Common Defects
- Over-trimming
- Under-trimming
- Burn marks
- Rough edges
Key Control Points
- Cutter sharpness
- Trimming profile accuracy
- Operator skill
- Edge quality inspection
Expert Tip: Monitor UV treatment expiry periods carefully.


Roughing and Buffing Operations
Strong adhesive bonding requires proper surface preparation. Many outsole materials possess smooth surfaces that do not readily allow adhesives to penetrate and create mechanical anchorage. Roughing and buffing solve this problem by increasing surface roughness and exposing fresh material for bonding.
Leather, rubber, EVA, TPU, and TPR components frequently undergo roughing before cement application. The process creates microscopic surface irregularities that significantly improve adhesive performance. Although roughing appears simple, it is one of the most critical operations affecting bond strength.
Materials Commonly Roughed
- Leather
- Rubber
- EVA
- TPU & TPR
- Crepe
Equipment Used
- Emery Wheel Machines
- Metal Brush Machines
- Automatic Roughing Machines
Common Defects
- Insufficient roughing
- Over-roughing
- Burn marks
- Surface contamination
Key Control Points
- Roughing depth
- Surface coverage
- Cleanliness after roughing
- Tool condition
Pro Tip: Use separate roughing tools for different materials.

Chemical Washing
Certain outsole materials contain surface contaminants, release agents, oils, waxes, or residues that interfere with adhesive bonding. Chemical washing removes these contaminants and prepares the surface for subsequent primer and adhesive applications.
The chemical selected depends on the outsole material. Using an incorrect chemical may damage the component or reduce bonding performance. Therefore, manufacturers carefully validate washing procedures during product development.
Materials Commonly Washed
- Rubber
- EVA
- TPR
- TPU
Benefits
- Improved adhesion
- Surface cleaning
- Removal of mould release agents
- Better primer effectiveness
Common Defects
- Incomplete cleaning
- Chemical residue
- Surface staining
- Material attack
Key Control Points
- Correct chemical selection
- Application consistency
- Drying time
- Ventilation control
Pro Tip: Establish embossing standards before production starts.
UV Priming for EVA Components
EVA materials often require specialized treatment before bonding because their surface characteristics can limit adhesive performance. UV priming exposes the EVA surface to ultraviolet radiation, modifying the surface energy and improving adhesive compatibility. After UV treatment, specialized primers are applied to further enhance bond strength.
Many modern athletic footwear factories rely heavily on UV activation systems because EVA remains one of the most widely used midsole materials. Since UV treatment effectiveness diminishes over time, strict control of treatment dates and expiry periods is essential.
Equipment Used
- UV Activation Machine
- UV Treatment Tunnel
- Primer Application Station
Benefits
- Improved bonding
- Increased surface energy
- Better adhesive compatibility
- Consistent bond strength
Common Defects
- Expired treatment window
- Insufficient UV exposure
- Uneven treatment
- Primer contamination
Key Control Points
- UV intensity monitoring
- Exposure time control
- Primer application quality
- Expiry date tracking
Pro Tip: Verify transfer foil adhesion through wear testing.
Posts you make Like

Troubleshooting Adhesive Bond Failures in Footwear Manufacturing…
Stamping and Identification Marking
Traceability is a fundamental requirement in modern footwear manufacturing. Every outsole component must be identifiable throughout production and quality investigations. Stamping operations apply production dates, batch numbers, purchase order references, cavity numbers, and other tracking information.
This information becomes extremely valuable when investigating quality issues or identifying production trends. For example, EVA components often receive date stamps immediately after UV treatment so operators can determine whether the treatment remains valid during assembly.
Typical Identification Information
- Production date
- Batch number
- PO number
- Mould cavity number
- UV treatment date
Benefits
- Product traceability
- Quality tracking
- Root cause analysis
- Production monitoring
Key Control Points
- Marking legibility
- Correct information
- Traceability compliance
- Batch verification
Pro Tip: Maintain stitching machine preventive maintenance schedules.
Grooving and Channeling Operations
Grooving creates decorative or functional channels within the outsole surface. These grooves may accommodate stitching, improve aesthetics, or support specific design requirements. The operation requires specialized tooling capable of maintaining consistent depth and width throughout the outsole.
In premium leather footwear, grooving often serves both decorative and functional purposes, particularly when outsole stitching is incorporated into the design.
Typical Groove Dimensions
- Approximately 1.5 mm width & depth
- Varies by design specification
Applications
- Outsole stitching channels
- Decorative patterns
- Design features
- Construction requirements
Common Defects
- Uneven depth
- Misalignment
- Surface tearing
- Tool marks
Key Control Points
- Groove consistency
- Tool condition
- Alignment accuracy
- Design compliance
Pro Tip: Control trimming blade sharpness daily.
Embossing Operations
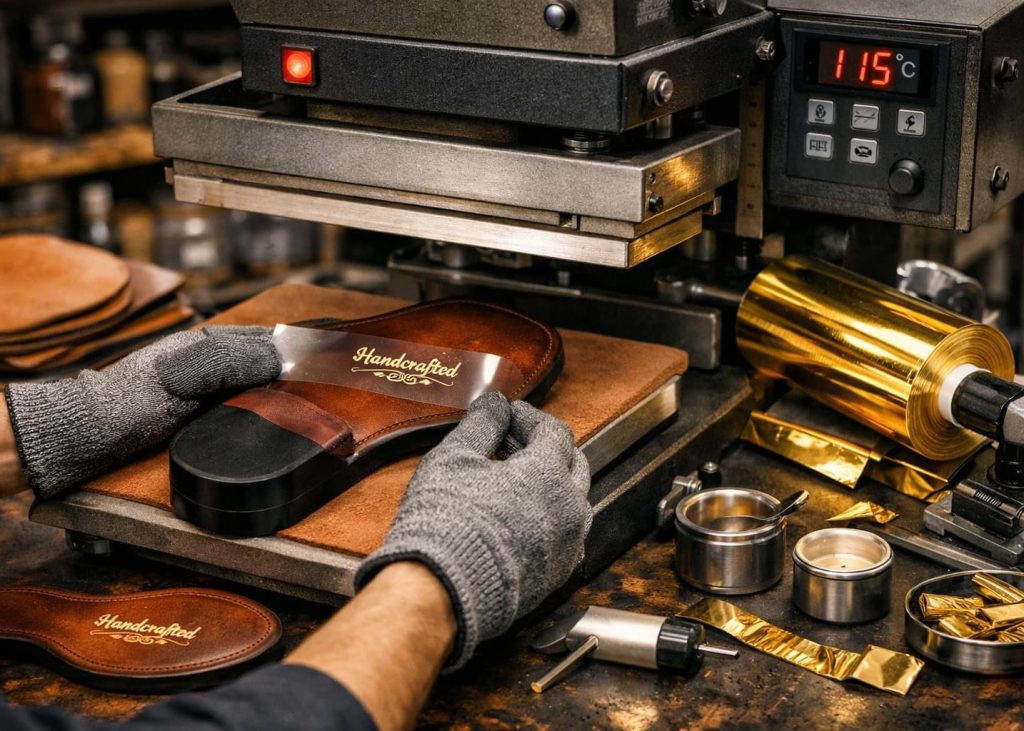
Embossing creates logos, branding, decorative patterns, and product identification marks on outsole surfaces.
Heat and pressure are typically used to transfer the required design into the material. Depending on the material type, embossing may be performed before or after assembly. The operation adds brand recognition and enhances product appearance while maintaining durability.
Applications
- Brand logos
- Size markings
- Decorative patterns
- Product identification
Machines Used
- Heat Embossing Machine
- Hydraulic Embossing Press
- Hot Stamp Press
Common Defects
- Incomplete embossing
- Double impression
- Misalignment
- Excessive depth
Key Control Points
- Temperature settings
- Pressure control
- Position accuracy
- Impression quality
Pro Tip: Track cavity-level moulding defects.
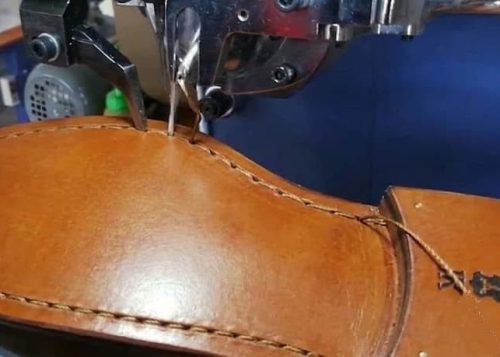
Outsole Stitching Operations
Certain footwear constructions require stitching directly on the outsole or sidewall areas. These stitches may provide structural reinforcement, decorative enhancement, or both. Heavy-duty stitching is commonly found in leather footwear, boots, outdoor footwear, and premium constructions.
The operation requires specialized stitching equipment capable of penetrating dense outsole materials. Besides improving aesthetics, stitching can also contribute to long-term durability by helping secure outsole components together.
Typical Applications
- Sidewall stitching
- Welt stitching
- Decorative stitching
- Reinforcement stitching
Machines Used
- Littleway Stitching Machine
- Heavy-Duty Sole Stitching Machine
- Outsole Lockstitch Machine
Common Defects
- Skipped stitches
- Uneven stitch length
- Broken thread
- Misaligned stitching
Key Control Points
- Stitch density
- Thread tension
- Needle condition
- Stitch path accuracy
Pro Tip: Standardize groove dimensions across all sizes.
Wheeling Operations
Wheeling is a decorative operation primarily used in premium leather footwear. A heated wheel creates fine impressions along designated areas of the outsole. The resulting pattern resembles decorative stitching and contributes to a handcrafted appearance.
Although wheeling does not provide structural reinforcement, it significantly enhances visual appeal and is frequently used in high-end dress footwear.
Benefits
- Premium appearance
- Decorative detailing
- Luxury aesthetics
- Traditional craftsmanship effect
Common Defects
- Uneven impressions
- Burn marks
- Inconsistent pattern
- Misalignment
Key Control Points
- Wheel temperature
- Pressure consistency
- Pattern alignment
- Surface quality
Painting Operations
Painting provides designers with additional opportunities to create unique outsole appearances. Various colors, effects, gradients, and decorative highlights can be applied depending on customer requirements.
Modern footwear designs frequently incorporate painted details to enhance brand identity and differentiate products within the marketplace. The challenge is maintaining consistency across production while ensuring long-term durability.
Applications
- Decorative effects
- Color highlights
- Brand styling
- Fashion detailing
Common Defects
- Color mismatch
- Overspray
- Poor adhesion
- Uneven coverage
Key Control Points
- Color approval
- Paint thickness
- Drying conditions
- Appearance inspection

Transfer Foil Application
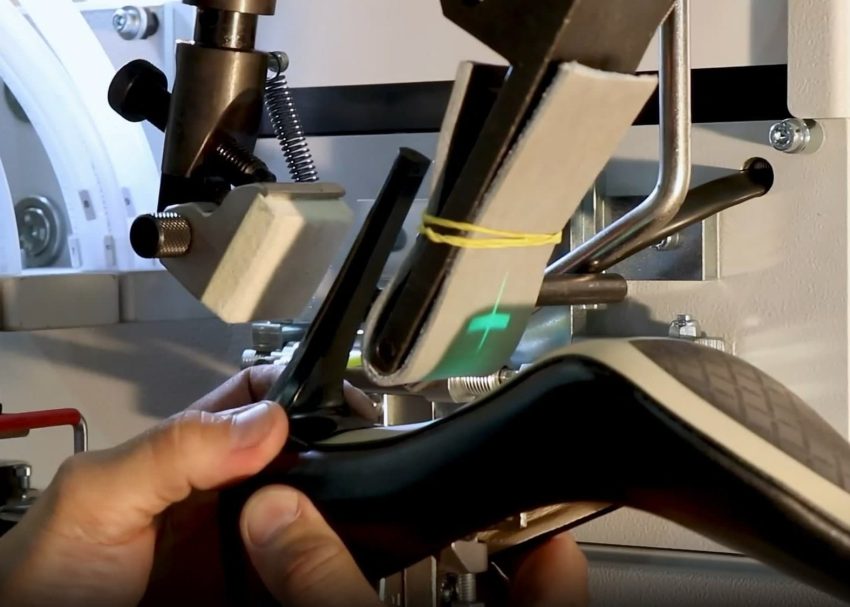
Transfer foils allow manufacturers to apply logos, textures, metallic effects, decorative finishes, and branding details to outsole components. Depending on the design and material, transfer foils may be applied through cold pressing or heat pressing methods.
This operation is widely used in fashion footwear, sports footwear, and premium branded products because it creates high-impact visual effects without significantly increasing material costs.
Application Methods
- Cold Press Transfer
- Heat Press Transfer
- Hot Foil Stamping
- Decorative Film Transfer
Benefits
- Premium appearance
- Brand enhancement
- Decorative flexibility
- Cost-effective styling
Common Defects
- Incomplete transfer
- Peeling
- Wrinkles
- Misalignment
Key Control Points
- Temperature control
- Pressure settings
- Surface preparation
- Transfer adhesion quality