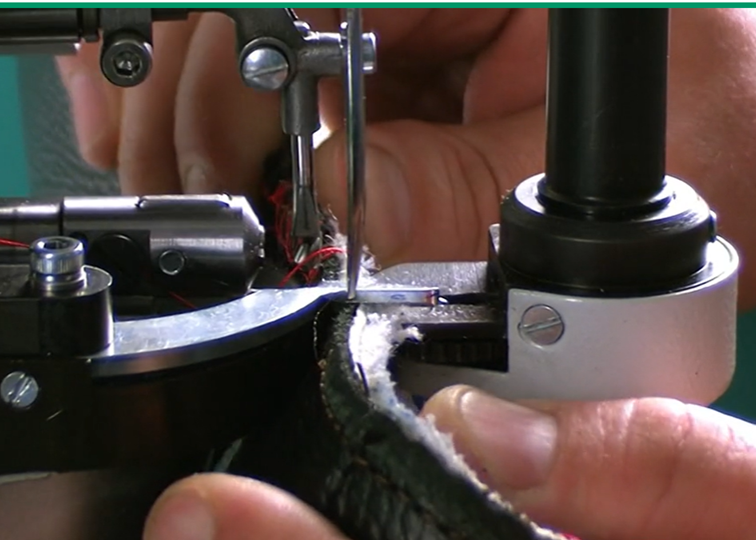
Strobel Stitching Process in Footwear Manufacturing – Full Shoe Assembly Series
In the previous blog, Toe Gathering Stitching (Strobel-Specific) process in Footwear Manufacturing – Full Shoe Assembly Series, we covered how excess upper material is controlled at the toe area before strobel stitching. Now, this blog explains the core Strobel Stitching process, where the upper is permanently joined to the strobel sock, forming the base structure of the shoe.
This process directly influences fit, flexibility, and lasting performance. Therefore, any variation here cannot be corrected in downstream operations.
Strobel Stitching – Process Overview
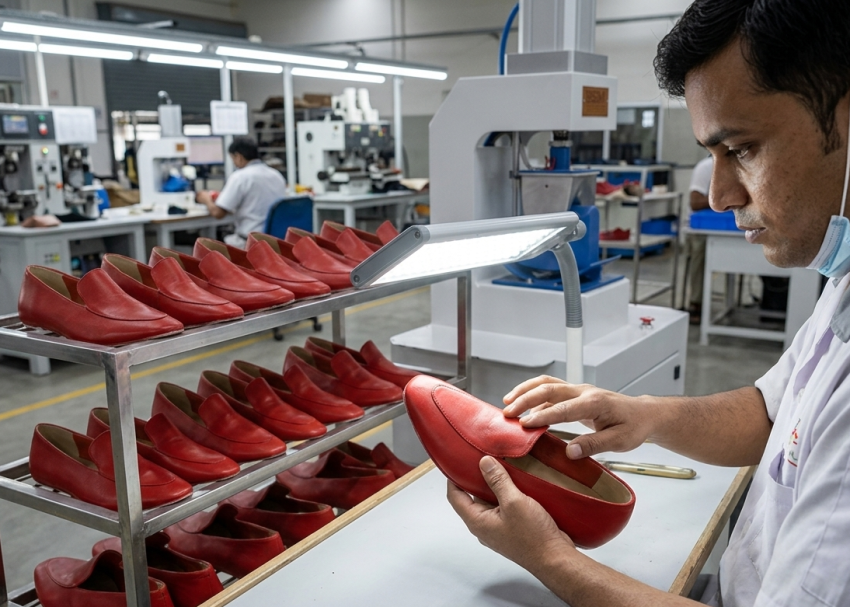
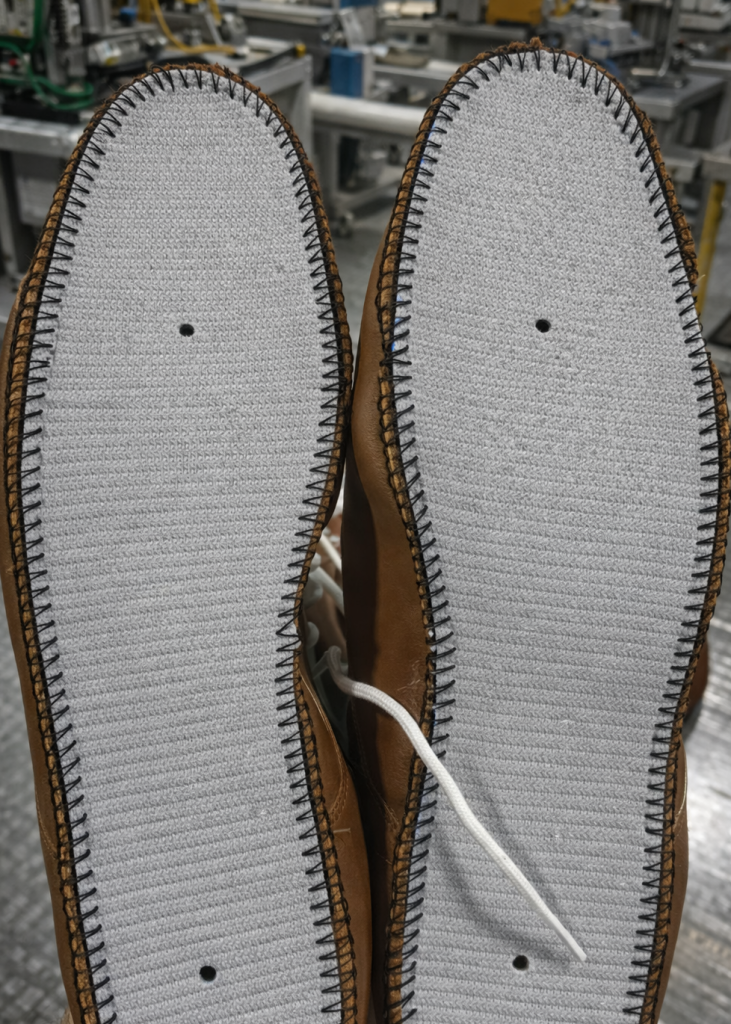
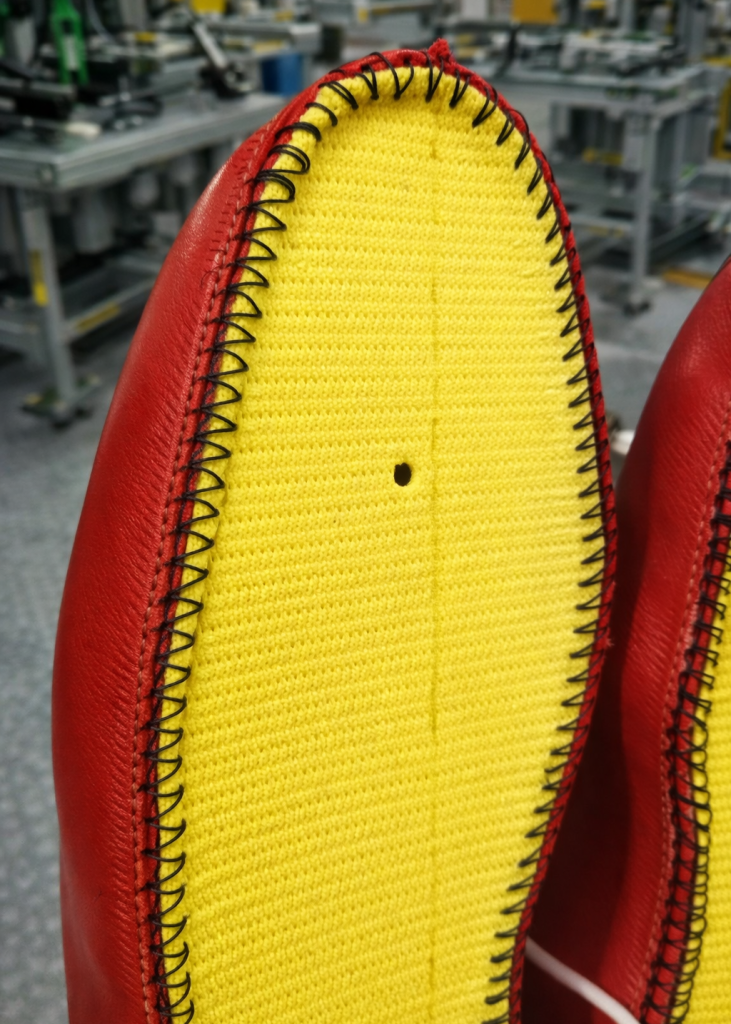
Strobel stitching is a specialized operation where the prepared upper bottom feather edge is stitched directly to a strobel sock (fabric insole) using a straight needle machine. This creates a lightweight and flexible construction, widely used in sports and casual footwear.
The process ensures that the upper and strobel are joined in a continuous seam, forming a closed “bag-like” structure ready for lasting. As a result, the shoe achieves better flexibility and comfort compared to board-lasted constructions.
In factory practice, operators must maintain consistent seam alignment, tension, and stitch density to avoid distortion. Moreover, incorrect stitching leads to lasting issues such as wrinkles, uneven pull, or seam opening.
In factory practice, operators must maintain consistent seam alignment, tension, and stitch density to avoid distortion. Moreover, incorrect stitching leads to lasting issues such as wrinkles, uneven pull, or seam opening.
Key Control Points:
- Maintain consistent seam width (3–5 mm)
- Ensure upper margin alignment with strobel edge
- Avoid twisting or puckering during stitching
- Check continuous stitch formation without skips
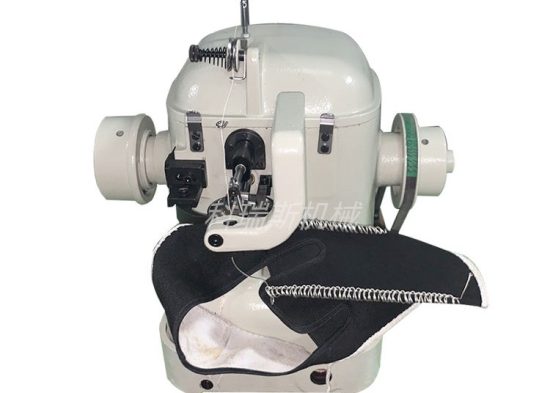
Courtesy : CORESMAC
Expert Tip: Maintain separate machines for different shoe categories (sports vs casual)

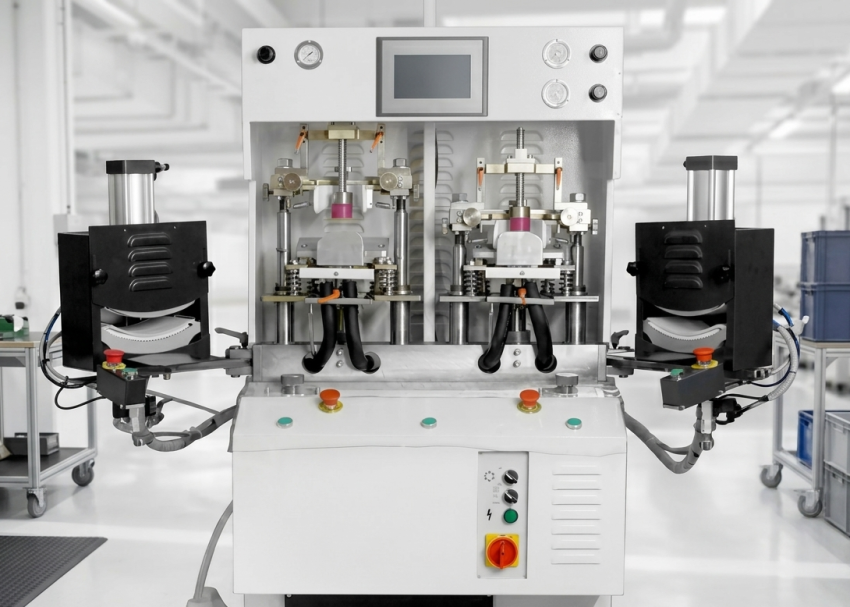
Strobel Stitching Machine Setup
The Strobel stitching machine is a specialized curved needle sewing machine designed to stitch in a circular path. Unlike flat-bed machines, it allows operators to stitch the upper to the strobel with precision and control.
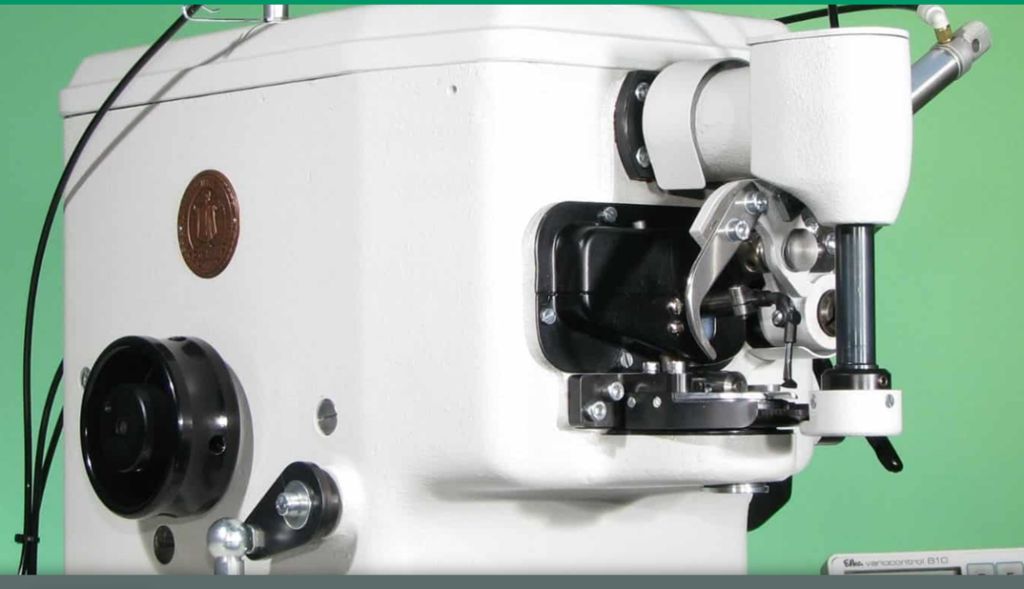
Proper machine setup is critical because even minor deviations in tension or feed can result in seam failure. Therefore, technicians must calibrate thread tension, needle position, and feed mechanism before production.
Additionally, the machine must handle flexible materials without stretching or damaging them. Hence, synchronized feeding between upper and strobel is essential.
Key Control Points:
- Use correct needle type (curved needle specific to machine)
- Calibrate thread tension before each shift
- Ensure smooth feeding without material slippage
- Regularly clean lint and adhesive residues
Pro Tip: Use thread lubrication to reduce friction and improve stitch quality


Stitch Parameters and Specifications
Stitch parameters define the strength and flexibility of the Strobel seam.
Therefore, factories must strictly follow standard specifications.
Typically, high-tenacity polyester or nylon thread is used to withstand lasting forces and repeated flexing.
Moreover, stitch density and seam width directly affect durability and comfort.
Maintaining the correct balance is important. For example, too tight stitching reduces flexibility, while loose stitching weakens the seam.
Key Control Points:
- Stitch per inch (SPI): 8–12
- Seam width: 3–5 mm
- Use high-strength thread (polyester/nylon)
- Maintain uniform stitch spacing throughout
Pro Tip: Train operators specifically for curved stitching control

Upper Preparation for Strobel Stitching
Before stitching, the upper bottom edge must be properly prepared. This includes trimming, and ensuring a clean margin for stitching.
If preparation is inconsistent, the seam will not align properly, leading to uneven lasting. Therefore, operators must ensure that the upper edge is smooth and defect-free. In addition, any excess material or uneven thickness must be corrected before stitching begins.
Key Control Points:
- Ensure clean and uniform upper edge
- Remove excess material and threads
- Maintain consistent thickness along margin
- Avoid contamination (dust, adhesive, oil)
Pro Tip: Conduct hourly seam audits during production
Strobel Sock Preparation and Positioning
The strobel sock acts as the foundation layer in this construction. It is usually made of non-woven fabric or textile composites, designed for flexibility and strength.
Proper positioning is critical because misalignment causes uneven seam formation. Therefore, operators must ensure that the Strobel sock is correctly aligned with the upper before stitching starts. Furthermore, the Strobel sock must not stretch during handling, as this affects final shoe shape.
Key Control Points:
- Align strobel sock accurately with upper
- Avoid stretching during handling
- Ensure correct size matching
- Check fabric integrity before use
Pro Tip: Standardize machine settings across lines
Stitching Execution Process
During stitching, the operator feeds the upper and strobel sock into the machine while maintaining alignment. The needle stitches continuously along the perimeter.
Consistency is the most critical factor here. Operators must maintain steady speed and avoid sudden movements. Otherwise, the seam may become uneven or distorted.
Additionally, attention is required at curved areas such as toe and heel, where alignment is more difficult.
Key Control Points:
- Maintain steady stitching speed
- Ensure continuous seam without breaks
- Control alignment in curved areas
- Avoid puckering or material bunching
Courtesy : CORESMAC
Pro Tip: Replace needles regularly to avoid skipped stitches
Seam Quality and Inspection
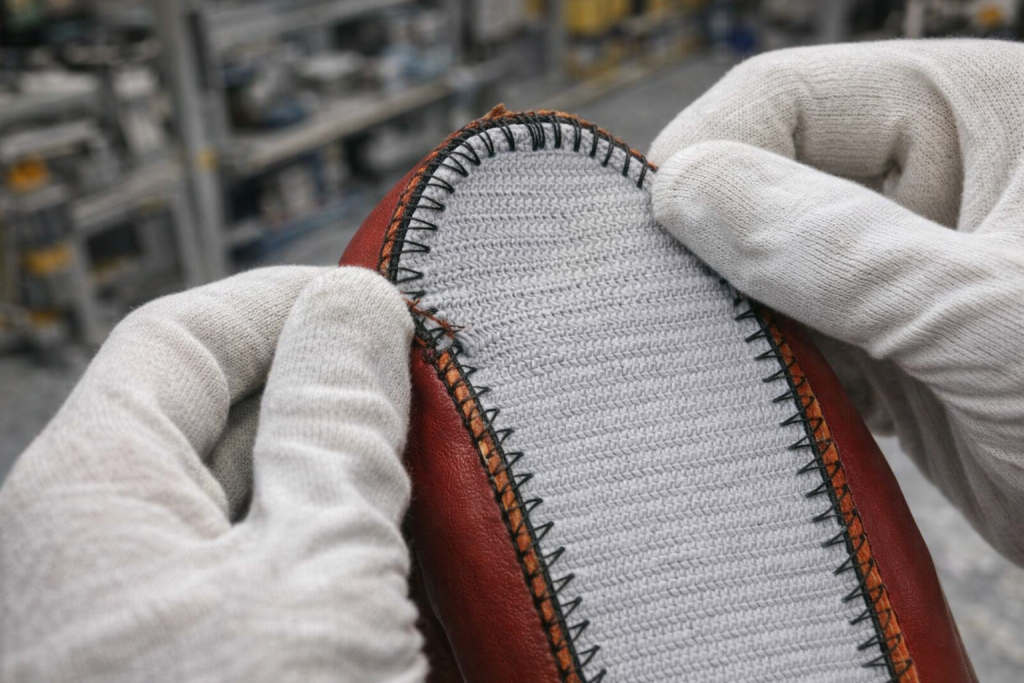
After stitching, the seam must be inspected for strength, alignment, and appearance. Since this seam directly affects lasting, any defect must be corrected immediately.
Inspection typically includes visual checks and manual pull tests. Moreover, factories may use flex testing to ensure durability under repeated stress.
If defects are found, the component must be reworked or rejected, as downstream correction is not feasible.
Key Control Points:
- Check for skipped or broken stitches
- Verify seam alignment and width
- Perform manual seam strength test
- Inspect for puckering or distortion
Pro Tip: Use pre-production trials for new materials
Common Defects in Strobel Stitching
Several defects can occur if process control is weak. These defects directly impact shoe performance and must be minimized.
For example, weak seams lead to failure during lasting, while uneven stitching causes fit issues. Therefore, root cause analysis is essential for continuous improvement.
Key Control Points:
- Seam opening due to low tension
- Puckering from uneven feeding
- Skipped stitches due to needle issues
- Misalignment causing shape distortion
Pro Tip: Monitor operator fatigue to maintain consistency
Conclusion
Strobel stitching is a critical structural process in footwear manufacturing that defines flexibility, comfort, and durability. Since errors cannot be corrected later, factories must maintain strict control over machine setup, stitching parameters, and operator skill.
In the next blog, we will cover Last Inserting in Footwear Manufacturing – Full Shoe Assembly Series, where the stitched upper is shaped over the last to define final shoe form.

Frequently Asked Questions – FAQs
1. Why is Strobel stitching preferred for sports shoes?
Because it provides flexibility, lightweight construction, and better comfort during movement.
2. What happens if Strobel stitching is weak?
The seam may fail during lasting or use, leading to product rejection.
3. Which thread is best for Strobel stitching?
High-tenacity polyester or nylon thread is commonly used.
4. What is the ideal SPI for Strobel stitching?
Typically between 8–12 SPI depending on product type.
5. Can defects be corrected after Strobel stitching?
No, major defects require rework or rejection.
6. What is the most common defect?
Skipped stitches and seam misalignment are most common.
7. How is quality checked?
Through visual inspection, seam strength testing, and flex testing.