Digital Shoe Pattern Making: Precision with CAD Workflows
CAD shoe pattern making is revolutionizing footwear design by turning 3D lasts into precise 2D patterns with speed and accuracy. Tools like Rhino3D and Shoemaster streamline the process, making it ideal for mass production and rapid prototyping. This guide explores the digital workflow, tools, and benefits to elevate your CAD shoe pattern making skills.
Why Choose CAD Shoe Pattern Making?
CAD delivers algorithmic precision, cutting waste and iteration time. Software like Shoemaster and Rhino3D handle complex flattening and simulations, perfect for modern footwear demands.
Core CAD Workflow: STL to Shoe Pattern
Using a 3D last in STL format, here’s how to create precise 2D patterns digitally
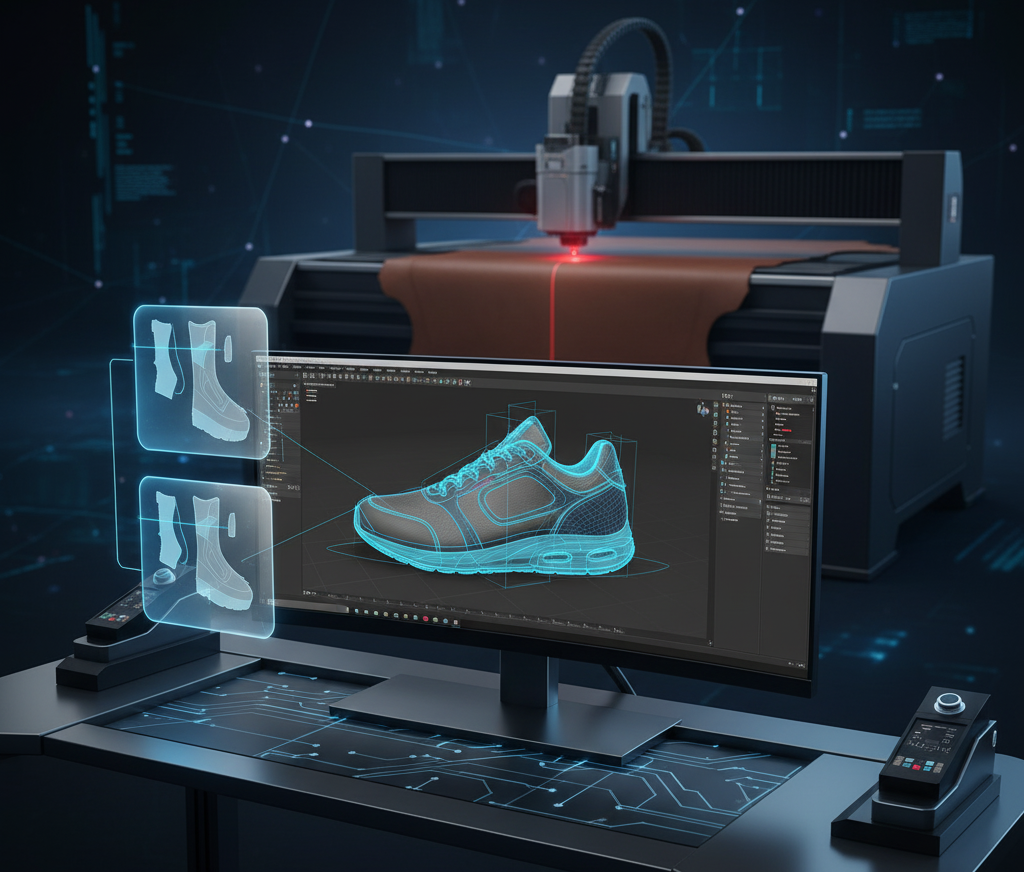
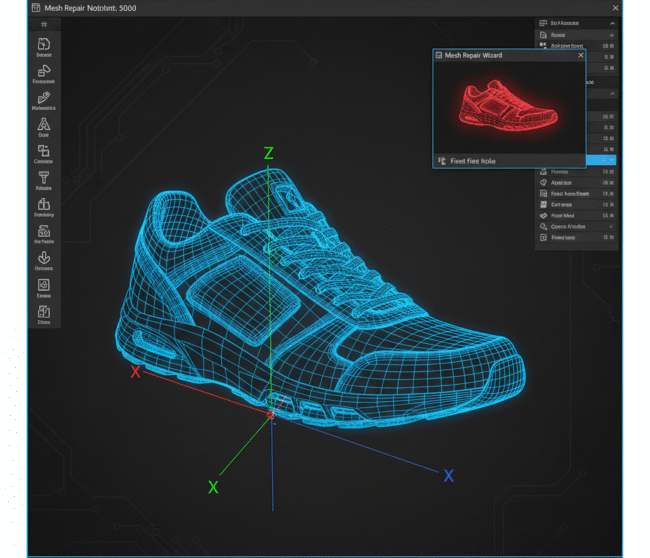
1. Import the STL File
- Load into CAD software (e.g., Shoemaster, Rhino3D).
- Repair mesh (fix holes, non-manifold edges).
- Align to origin with medial, lateral, and bottom planes.
Tip: Use watertight STL files to avoid errors.
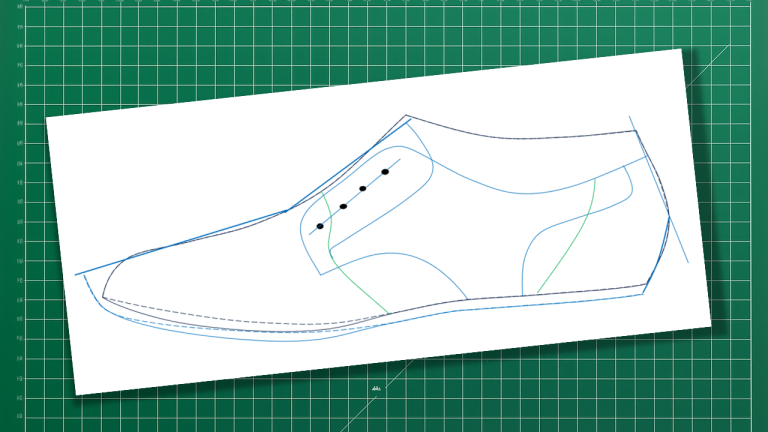
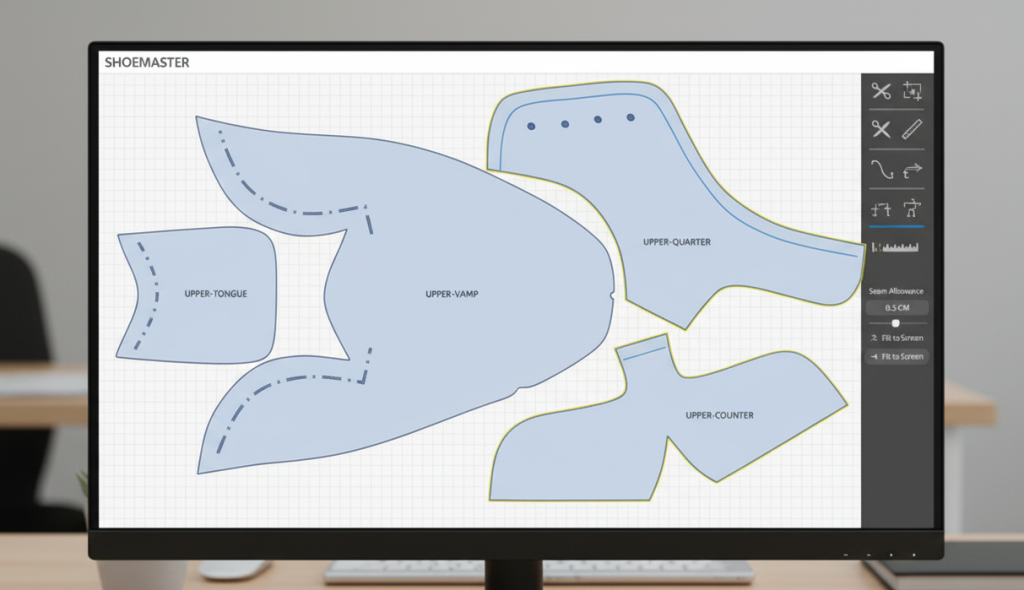
2. Define Pattern Lines
- Draw construction and design lines (vamp, eyestay, heel counter) on the 3D last.
- Use symmetry tools to mirror lines across sides.
3. Flatten to 2D
- Select surface regions and apply unwrapping algorithms.
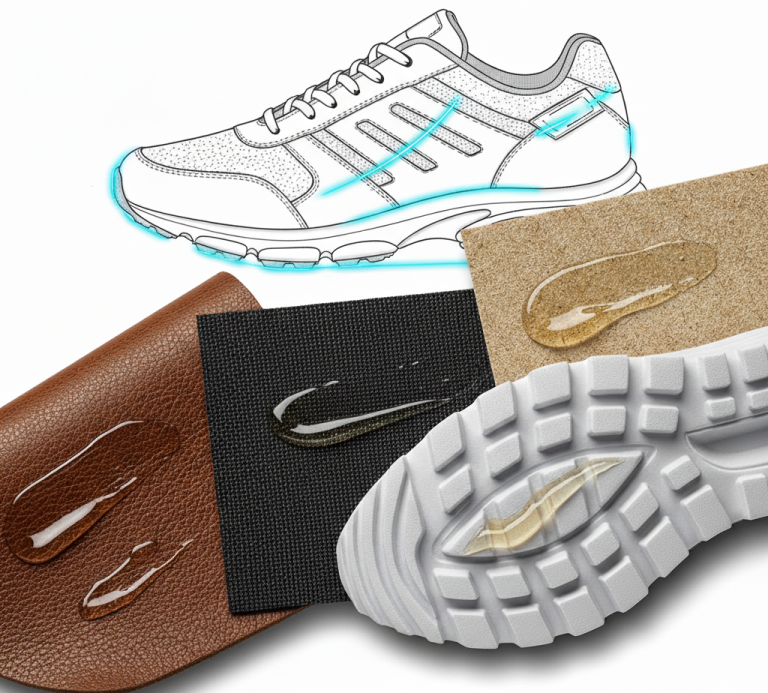
- Adjust for material stretch (e.g., leather vs. mesh).
- Simulate material behavior for accuracy.Overlay and average them to create the mean form.
4. Add Technical Details
- Ensures fit accuracy across sizes.
- Base for all subsequent patterns.
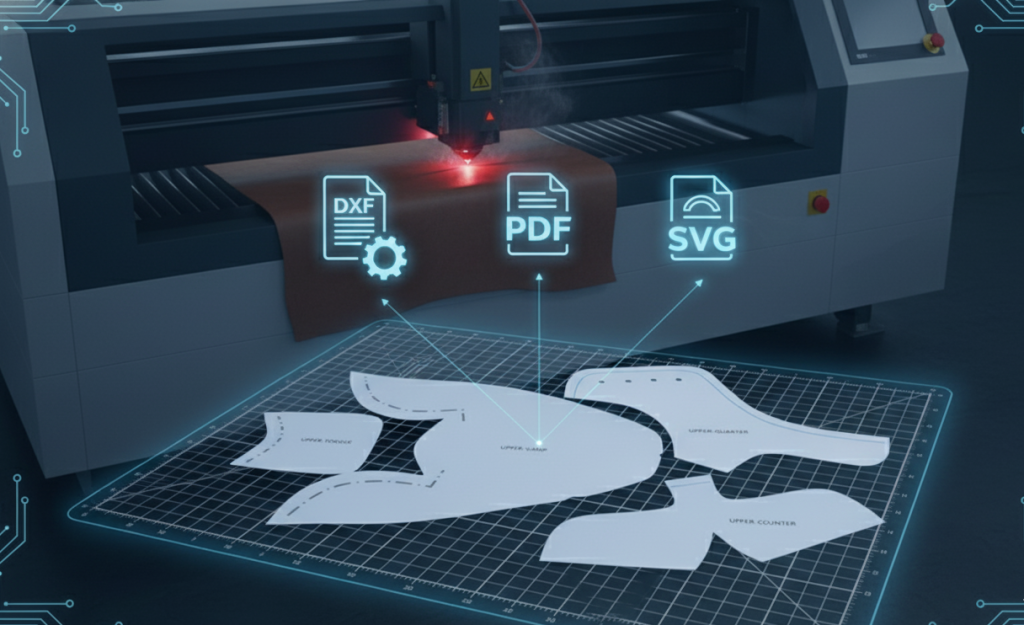
5. Export for Production
- Export as DXF (laser cutting), PDF (printing), or SVG (CNC).
- Nest pieces for material efficiency.
Watch Video from Shoemaster for more interesting Visuals.
Optional Enhancements
- 3D simulation to preview upper wrapping.
- Material mapping for texture zones.
- Sole integration for precise edges.
Manual vs. CAD: A Quick Comparison
| Feature | Manual Methods | CAD Workflows |
| Setup Cost | Low (basic tools) | High (software) |
| Accuracy | Skill-dependent | Algorithmic precision |
| Speed | Slower iterations | Fast scaling |
| Ideal Use | Bespoke, prototypes | Mass production, R&D |
CAD reduces waste and labor, making it a game-changer for efficiency.
Visualizing the Digital Workflow
Here’s the STL-to-pattern process in a nutshell:
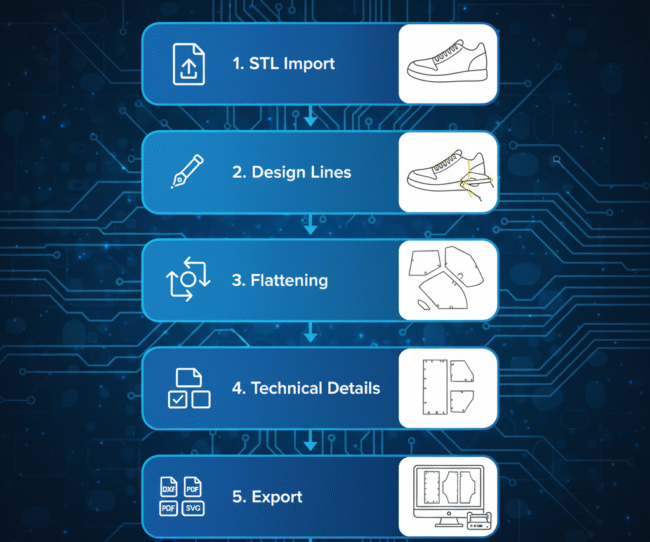
- STL Import → Load and align in CAD.
- Design Lines → Draw Style Lines
- Flattening → Unwrap surfaces, adjust stretch.
- Technical Details → Add seams, allowances, notches, labels.
- Export → DXF, PDF, or SVG for production..
Benefits of CAD Shoe Pattern Making
CAD’s precision and speed power modern footwear, from sneakers to luxury heels. Tools like ICad3D+ are used by brands like Zara for rapid modeling.. Explore Manual Pattern making in our previous Blog
Pro Tip: Experiment with free CAD trials to test workflows before investing.