Hand Lasting in Footwear Manufacturing: Traditional Techniques, Drafting Control, and Structural Precision
Introduction to Hand Lasting in Footwear Construction
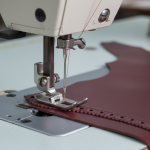
In traditional footwear manufacturing, hand lasting represents the original and most fundamental method by which uppers are shaped and secured to the last. Historically, lasting machinery evolved through attempts to replicate the precise movements of skilled hand lasters. As a result, many mechanical systems imitate the twisting, pulling, and directional control achieved through hand pincers. However, with the introduction of automatic lasting machines and heat-shrink moulding processes, particularly in slip-lasted constructions, the industry has gradually reduced its reliance on manual techniques.
Despite these technological advances, hand lasting continues to play a vital role within the industry. It remains essential not only because it forms the technical foundation of machine lasting principles, but also because it allows a level of individual control that machines cannot achieve. For bespoke footwear and surgical shoe construction, manufacturers still consider hand lasting the normal and preferred method, as each shoe can be adjusted precisely to individual requirements rather than averaged production standards.
Preparation of Components for Hand Lasting
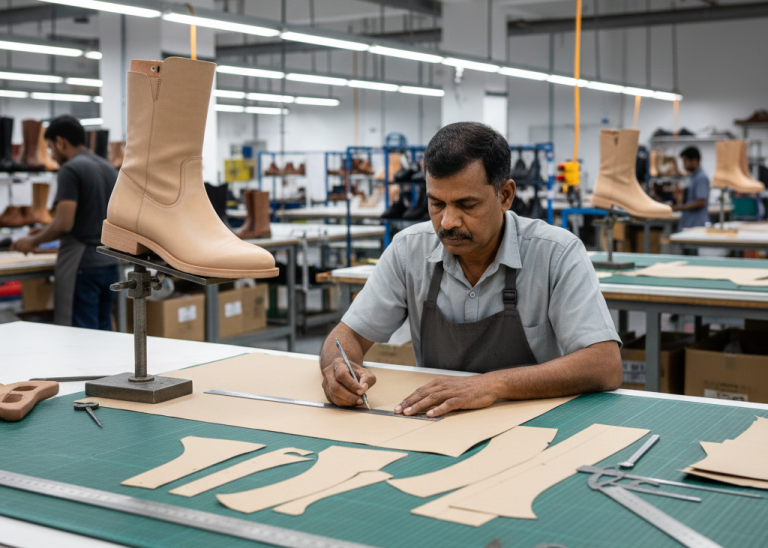
The first stage in hand lasting requires careful preparation of all component parts. Insoles used for machine-made footwear differ significantly from those prepared for hand-sewn constructions. However, these differences do not directly influence the hand laster’s work. This is because the laster primarily manipulates the upper and uses the available insole as a stable base once the upper is moulded into the correct shape.
At this stage, the laster focuses on ensuring that the upper sits correctly on the last. In addition, materials receive conditioning to enable controlled stretching. As a result, these preparatory steps support consistent tension control during later drafting and lasting operations. Proper preparation at this point ensures that subsequent processes proceed smoothly and accurately.


Tying-Over: Temporary Control of the Upper
The first operational procedure in hand lasting is known as tying-over, which refers to the temporary lacing of the upper tabs. This operation plays a critical role, as any inaccuracy at this stage directly affects the fit, appearance, and structural balance of the finished shoe.
If the laster carries out tying-over too loosely, the vamp line draws away in the waist area during lasting. Consequently, the bottom of the tabs may fall below the instep point, resulting in a shoe that fits smaller than intended. In addition, the back of the shoe can sink lower than designed because resistance at the instep reduces. Conversely, when the laster applies excessive tightness, the opposite effects occur, restricting the upper and compromising comfort and balance.
For Oxford shoes, best practice recommends leaving approximately one-eighth of an inch between the tabs, with the knot securely tied. This allowance enables the wearer to lace tightly over the instep during use, thereby achieving a secure and comfortable ankle fit.
Pro Tip: In bespoke footwear, tying-over is not standardised. Instead, it is adjusted according to individual foot measurements, instep height, and fitting requirements.
Tying-Over for Open Tab and Blocked Front Designs
When working with uppers that feature open tabs and a blocked front, such as Derby boots, it is customary to tie-over to the fourth eyelet from the bottom. However, when the front is not blocked, it is advisable to leave the bottom eyelets unlaced and begin lacing higher up. This approach allows the laster to clear the vamp more effectively during drafting.
Unblocked fronts have a tendency to wrinkle between the tabs if the bottom eyelets are tied-over. By leaving these eyelets free, the laster can achieve smoother material distribution and improved surface appearance.
Pro Tip: Leaving lower eyelets unlaced on unblocked fronts significantly reduces vamp wrinkling during drafting.
Cap Line Alignment and Seat Adjustment
Following tying-over, the shoe is removed from the last jack and turned over to assess whether the cap line is straight. If misalignment is observed, correction is generally straightforward. The upper is repositioned so that the cap line is straight and securely fixed, while the back of the upper is hoisted or pulled up to correct the seating position on the last.
In the case of sewn seats, a rivet is driven through the upper on the outside, passing through the stiffener, lining, and feather of the insole. At this stage, the rivet is intentionally not driven fully home, as further adjustment will be required during later operations.
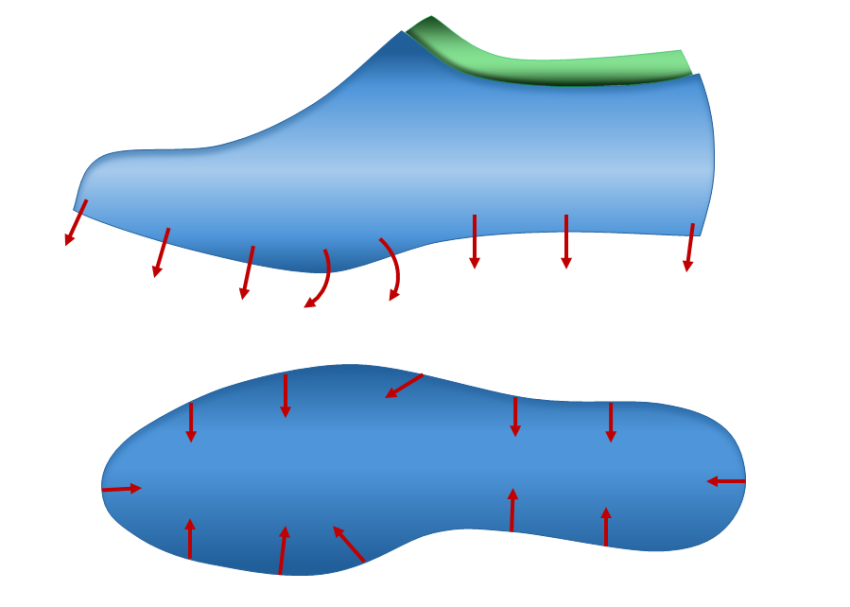
Drafting: Establishing Initial Shape and Tension
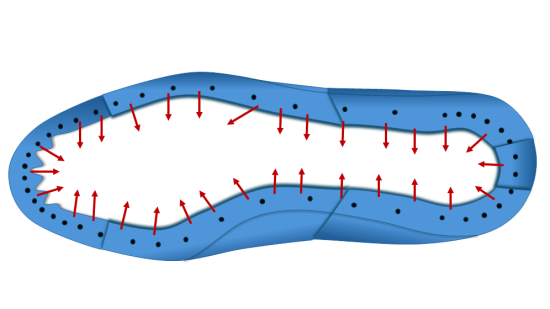
Drafting is the stage during which the initial stretch is taken out of the upper and the material is moulded approximately to the shape of the last in preparation for final lasting. This process is performed entirely by hand using pincers, with a series of carefully controlled pulls taken in different directions according to the contours of the last.
The objective of drafting is to establish uniform tension throughout the upper while balancing the moulding so that the shoe retains its shape throughout its service life. If drafting is poorly executed, the shoe may appear acceptable initially but will gradually lose its intended form during wear.
Extra Insight: Correct drafting is essential for long-term shape retention and dimensional stability in finished footwear.

Hoisted Method of Drafting
In hand lasting, drafting is carried out using the hoisted method. The prepared upper is placed loosely over the last, after which both are turned upside down. The last is then positioned on the peg of a lasting stand or jack. At this point, the upper is adjusted. So that the bottom edge of the back lies approximately three-eighths of an inch below the seat of the last.
Although both the upper and the last are upside down during this operation. The term bottom edge refers to the position as it appears in the finished shoe when worn.
Direction and Sequence of Drafting Strains
Drafting strains are applied in a specific and carefully controlled order, beginning at the toe end. The initial pulls draw material over the edge of the insole, establishing longitudinal tension from heel to toe. Subsequent strains position the toe cap correctly. Balance material on both sides of the vamp, and progressively reduce surplus material in the waist area.
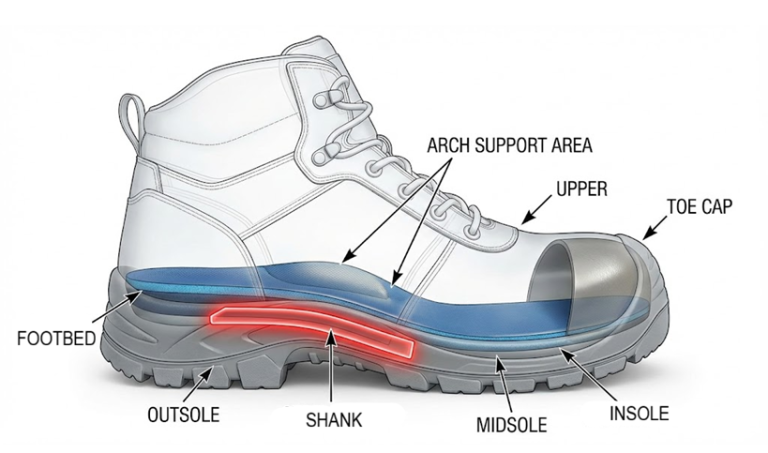
Final strains are taken at the waist and top-line areas to ensure clean quarter alignment. Each strain is secured by driving a lasting rivet through the lasted margin into the Insole feather Edge. This controlled sequence ensures even distribution of tension and prevents distortion of the upper.
Inspection After Drafting
Once drafting is complete, the shoe must be carefully examined before proceeding further. At this stage, the cap line should be straight, the upper should lie tightly and evenly against the last. The linings should be free from wrinkles. Additionally, the back seam should be central and straight. The top line should be even, and the gap between the tabs should align with the centre of the toe.
Pro Tip: Errors left uncorrected after drafting are difficult to rectify later and often compromise final quality.

Hand Lasting for Welted Footwear Construction
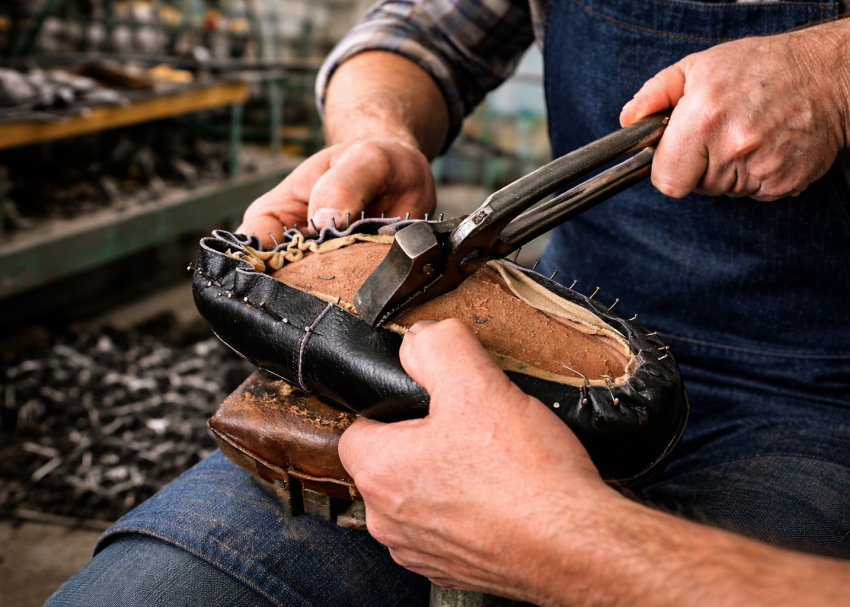
The actual lasting of the upper now follows. For welted footwear, it is best practice to begin at the inside waist, as this area requires the strongest pull. To achieve this, a specialised tool known as a waist drag is used to lever the upper firmly into position before the securing rivet is driven.
After completing the inside waist, the outside waist is lasted next, although without the use of the waist drag due to reduced curvature. The forepart of the shoe, excluding the toe, is then lasted, beginning on the inside and followed by the outside. During these operations, the applied tension must be sufficient to ensure a tight fit to the last without disturbing the original pattern lines.
The seat is lasted last, using a controlled twisting action with the pincers, and the upper is held over the insole with the thumb before being tacked down.
Finishing the Lasted Upper
Once lasting is complete, the shoulder just below the rivets is lightly beaten to provide a clear feather line suitable for hand welting. This process creates a defined leather edge on which further construction operations can be carried out. The upper is then trimmed almost level with the rivets, and the shoe is prepared for the sewing stage.
Pro Tip: Excessive beating weakens the feather and negatively affects welt stitching accuracy.