Footwear Pattern Grading: Complete Technical Guide to Length, Width and Section Grading in Shoe Manufacturing
Introduction
Footwear manufacturing does not end with designing a single shoe size. Once a model has been approved, it must be accurately transformed into a complete size range while maintaining identical fit characteristics, appearance, balance, and performance. This transformation process is known as pattern grading.
Grading is often misunderstood as simple enlargement or reduction. However, in professional footwear engineering, grading is a controlled mathematical process based on the geometry of the last and the anatomical growth of the foot. When grading is executed correctly, every size behaves exactly like the original model size during lasting, wearing, and long-term use.
This technical guide explains the traditional grading principles of US Grading System that still form the foundation of modern CAD grading systems used across global footwear factories.
Understanding the Concept of Grading
In footwear development, patterns are first created using a selected sampling size positioned near the middle of the size range. This base pattern becomes the reference from which all other sizes are derived.
For example, within a ladies’ size range of 5–11, a middle size such as size 6 is normally selected as the model size. Patterns created on this size are considered the most balanced representation of the design.
Three important technical terms must be clearly understood:
- Grading Model refers to the base pattern used for size development.
- Model Size is the sampling size on which the original pattern is built.
- Grade describes the dimensional difference between consecutive sizes.
Because footwear must fit a physical last, grading always follows last measurements rather than visual scaling.


Relationship Between Last and Pattern Length
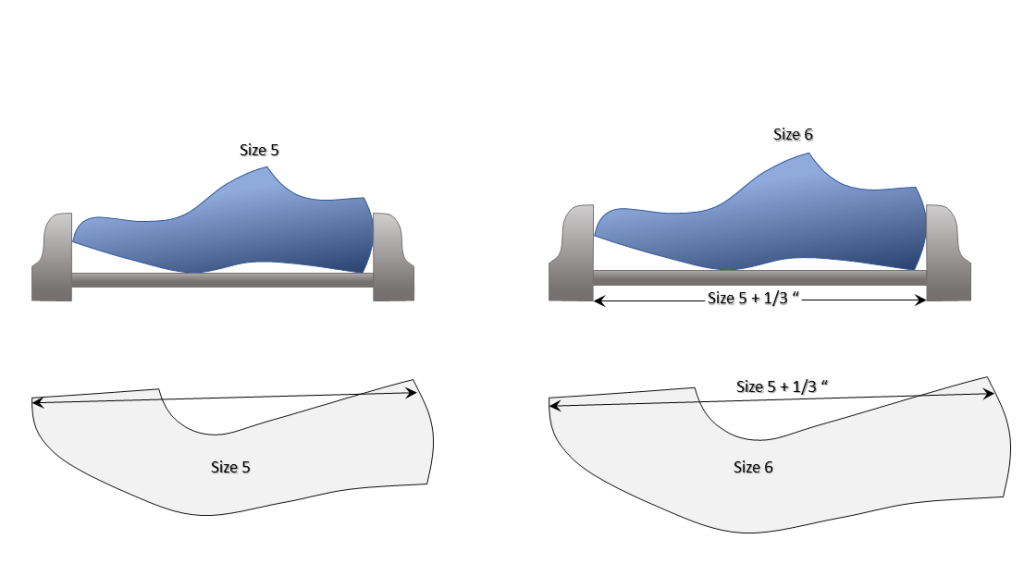
The starting point of grading lies in the footwear last. Since all shoe components must fit the last precisely, pattern grading must mirror last grading exactly.
Industry standards establish that last length increases by 8.47 mm for every full size increment Consequently, uppers, insoles, and soles must also increase by the same amount.
If this relationship is not maintained, several manufacturing issues appear. Toe shape distortion may occur, vamp tension may change during lasting, and fit inconsistency may develop across sizes. Therefore, length grading is never adjusted independently; it is always governed by last development.
Width Grading and Joint Girth Relationship
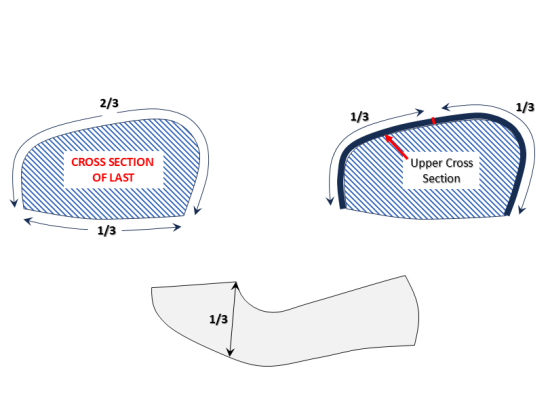
While length grading appears straightforward, width grading is controlled by a more complex measurement known as joint girth. This measurement represents the circumference around the ball area of the foot — the most critical fit zone.
Adult lasts increase joint girth by 6.35 mm per size. However, this increase is not evenly distributed.
- Approximately one-third occurs across the tread area.
- Two-thirds occurs over the upper portion of the shoe.
Because the standard pattern represents only half of the upper, only a proportional portion of the girth increase is applied during grading. As a result, the effective pattern width grade becomes 2.12 mm per size.
This proportional method ensures natural volume growth without producing excessively wide or unstable footwear.
Length and Width Grading Applied to Lasts
All footwear size ranges originate from a single model last. Traditionally, sizes were produced using grading lathes, while modern factories rely on digital last engineering systems. Regardless of technology, the grading values remain unchanged.
For each full size:
- Length increases by 8.47 mm
- Width increases by 2.12 mm in adult ranges
- Smaller size ranges may use 1.59 mm width increments
Patterns must strictly follow these values to preserve fit integrity.
Grading Standards Applied to Patterns
Once the last grading has been defined, pattern grading follows identical increments. These grading standards apply to all upper components regardless of design complexity.
Length grading ensures proportional extension from heel to toe, while width grading controls volume expansion across the joint area. When these values are correctly applied, visual proportions remain consistent throughout the size range.
Grading of Bottom Components
Bottom patterns, including outsoles, insoles, and sock components, follow the same engineering logic used for uppers.
The outsole must match last length growth exactly, meaning each size increases by 8.47 mm. Width grading corresponds to the tread area, which represents one-third of joint girth. Therefore, outsole width grading remains aligned with pattern width grading values.
Incorrect bottom grading often results in outsole overhang or insufficient coverage, both of which negatively affect durability and appearance.
Grading Individual Pattern Sections
Individual pattern sections such as vamps, quarters, and facings do not receive full grading values because they represent only portions of the standard pattern. Instead, grading must be distributed proportionally.
The grading applied to each component depends on its relationship to the full standard measurement.
Length Grade Formula
Component Grade =
(Component Length ÷ Standard Length) × 8.47 mm
Example:
If a vamp measures 76.2 mm within a 304.8 mm standard length, the vamp grading becomes approximately 2.12 mm per size.
Width Grade Formula
Component Grade =
(Component Width ÷ Standard Width) × 2.12 mm
Example:
A quarter depth of 25.4 mm within a 76.2 mm reference produces a grading value of approximately 0.71 mm per size.
Through proportional grading, assembled components collectively achieve the full grading requirement.
Important Technical Principle
A standard represents only half of the last. Therefore, when full patterns are inspected, grading appears on both sides.
This means that a width grade of 2.12 mm effectively produces a total increase of 4.24 mm per size across the full upper. Failure to recognize this principle frequently leads to incorrect inspection conclusions in factories.


Practical Factory Method for Checking Width Grading
A reliable manual verification method is widely used in development rooms.
The process involves aligning the smallest and largest graded vamps at the joint line while keeping one edge level. The difference measured at the opposite edge should equal the total accumulated grading.
For example, between size 5 and size 11:
- Size difference = 6 sizes
- Expected increase = 6 × 4.24 mm
- Total difference = 25.4 mm
This simple check quickly confirms grading accuracy.
Expert Insights from Industry Practice
Although grading technology has evolved into advanced CAD systems, the mathematical principles remain unchanged. Experienced pattern engineers understand that grading accuracy directly influences lasting behavior and wearer comfort.
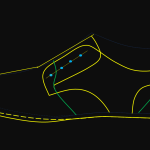
It has been consistently observed that joint girth control plays a greater role in fit consistency than overall length grading. Furthermore, decorative lines and stitching placements must also follow proportional grading to avoid visual imbalance.
Pro Tips for Pattern Engineers
- Always establish the joint line reference before grading begins.
- Grading should be applied to the net patterns (prior to adding seam allowances)
- Toe spring and heel pitch must remain constant across sizes.
- CAD grading results should always be verified physically.
- Section grading should be reviewed after stitching assembly trials.
Common Grading Errors Seen in Factories
Even experienced teams occasionally encounter grading problems caused by incorrect assumptions. The most frequent issues include:
- Uniform scaling instead of proportional grading
- Ignoring half-pattern logic
- Over-grading quarter areas
- Incorrect outsole width relationships
- Mixing children and adult grading standards
Recognizing these risks early significantly reduces development delays.


Conclusion – The Future Starts on Screen
Footwear grading is a precise engineering discipline rather than a simple enlargement process. By following established relationships between last geometry, joint girth, and proportional pattern grading, manufacturers can ensure that every size delivers identical comfort, appearance, and structural stability.
These traditional principles continue to support modern footwear production worldwide and remain essential knowledge for pattern engineers and technical developers.