Mastering Hand Grading Techniques for Shoe Patterns: A Modern Approach for Accuracy and Speed
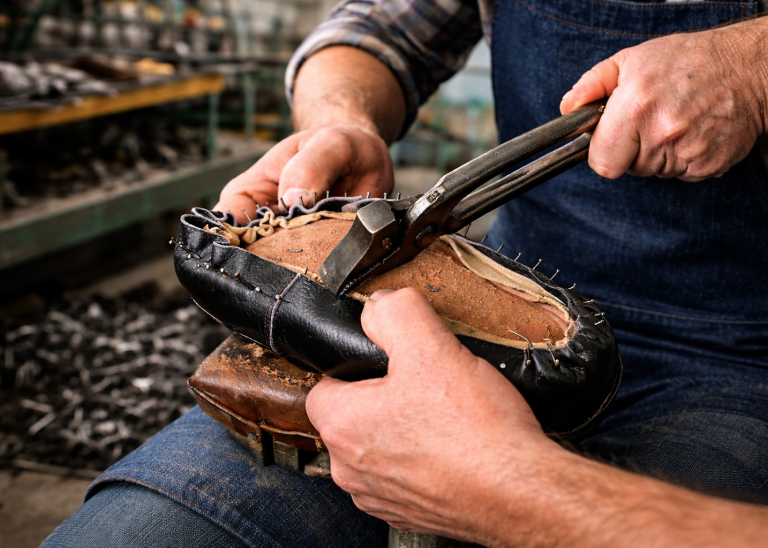
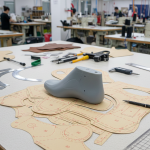
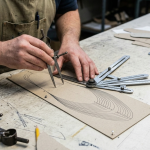
In the footwear industry, precise pattern grading remains one of the most critical steps to ensure consistent fit, elegant appearance, and efficient production across an entire size and fitting range. While automated grading machines dominate large-scale manufacturing, hand grading continues to play an essential role — especially during sampling, small-batch production, style development, and quality checking. A well-executed hand grading method allows experienced pattern makers to quickly produce a reliable size 8 (or any target size) directly from a size 7 model without relying on stencils or complex machinery, saving valuable time in fast-paced sampling rooms.
This article explores a proven, measurement-based hand grading system that delivers results comparable to machine grading. Whether you work in a factory, design studio, or teaching environment, mastering these techniques will help maintain balance, control critical dimensions, and eliminate unnecessary forme cutting for multiple fittings.
Why Hand Grading Still Matters in Modern Footwear Production
Even with advanced pantograph-based machines (Hartford, Reed, Linham, Universal, etc.), many experienced pattern cutters prefer hand methods for the following reasons:
- Instant verification and correction during sampling
- Greater control over restricted areas (underlays, folding allowances, bar/straps)
- Ability to grade one size up or down rapidly without machine setup
- Easier adaptation when coordinating patterns to fixed last characteristics (toe spring, heel height, waist curvature)
Moreover, this measurement-driven approach ensures the same proportional balance is preserved across fittings — a huge advantage when producing ladies’ court shoes, children’s styles, or any design where girth grading must remain strictly controlled.

Understanding the Core Principle: The Grading Tool
The foundation of accurate hand grading lies in a simple, custom-made grading tool (also called a grading stick or proportional scale).
How to construct the basic grading tool
- Draw a horizontal base line A–C the same length as your standard last or pattern length.
- From point C, draw a perpendicular line C–D.
- On line C–D, measure exactly 1/8 inch (3.175 mm) from C and mark point E.
- Connect A to E — this angled line becomes your measuring edge.
Whenever you place point A of the tool on a reference line and slide the angled edge across a pattern section, the point where a critical curve or seam intersects the tool reveals the exact grade increment required between sizes.
Expert Tip: Keep several grading tools calibrated for different increments — one for ⅛ inch (3.175 mm) full-size grade, another for 1/12 inch (2.117 mm) joint/vamp grade, and a third for children’s 1/16 inch (1.588 mm) grade. Label and laminate them for daily use.
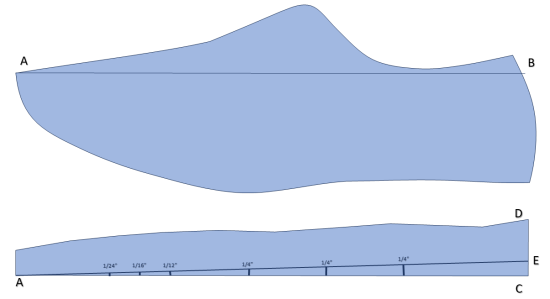
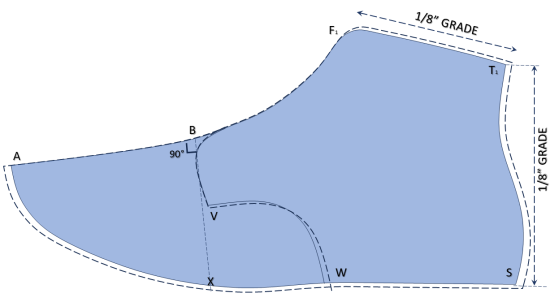
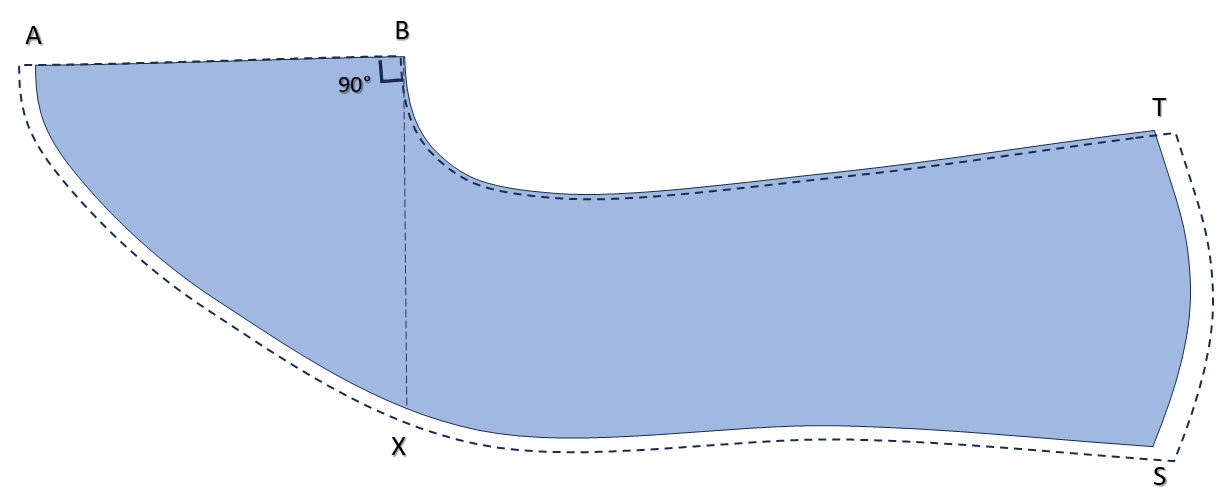
Key Reference Points and Typical Grade Increments (Men’s Standard)
Most men’s dress and casual shoe patterns follow these widely accepted increments between consecutive sizes:
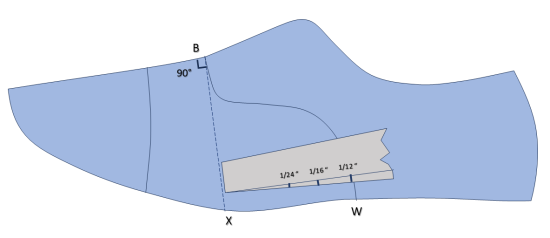
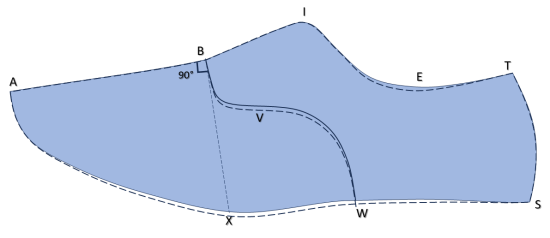
- Joint line (point B) → grading centre
- B–A (front height) → 1/8 inch (3.175 mm)
- B–X (vamp length / wing) → 1/12 inch (2.117 mm)
- X–S (seat / back part) → 1/24 inch (1.058 mm)
- S–T (back height) → 1/16 inch (1.588 mm)
- Toe joint to vamp throat → usually 1/12 inch (2.117 mm)
- V (crease line allowance) → 1/32 inch (0.794 mm)
- W (joint girth area) → 1/12 inch (2.117 mm) for length, controlled for fittings
Pro Tip: Always double-check these values against your factory’s approved size chart. Some markets (Asia vs. Europe vs. USA) apply slightly different increments, especially in the joint and instep
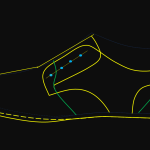
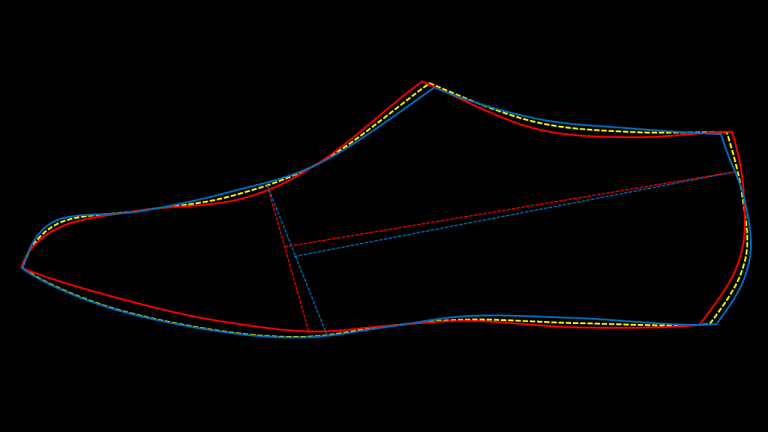
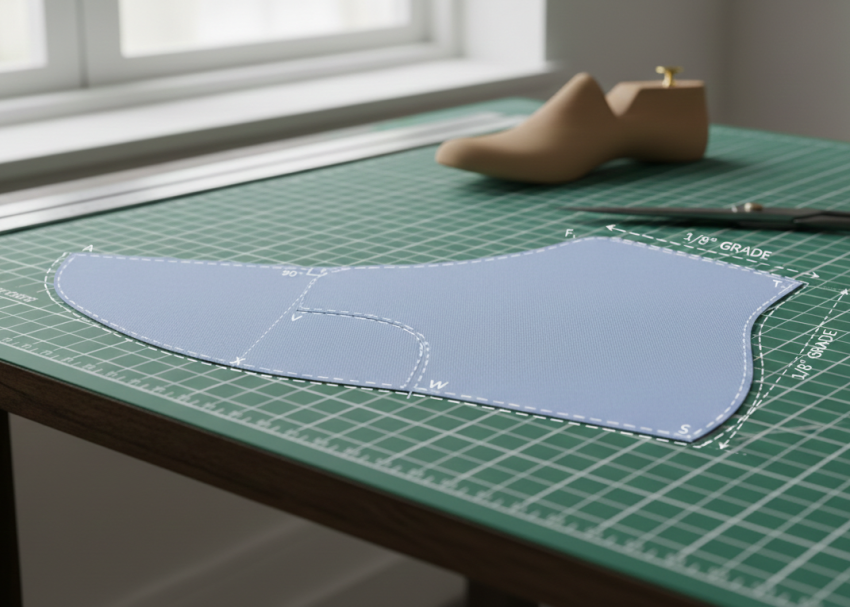
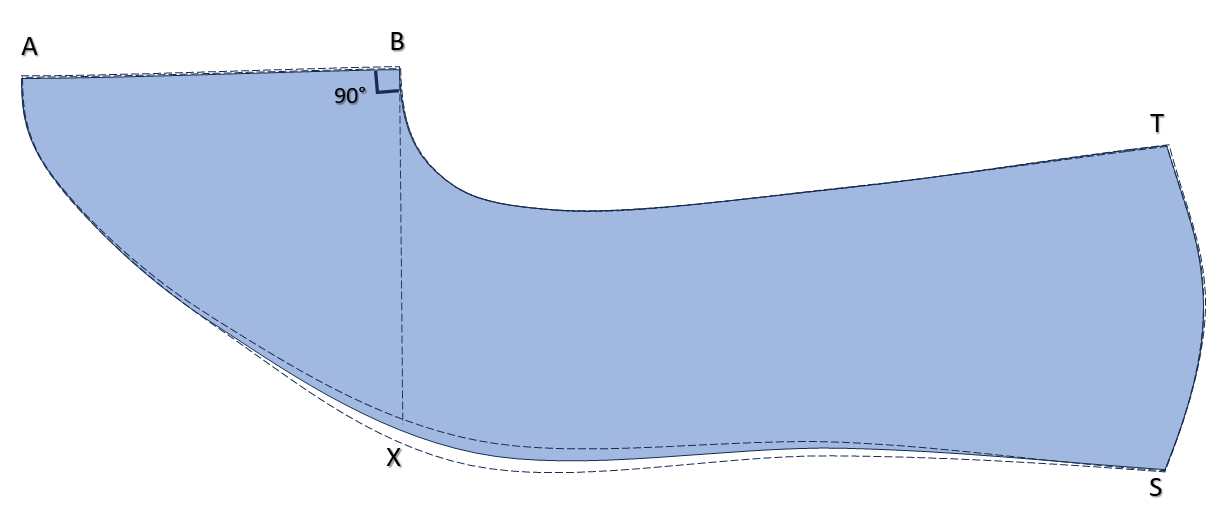
Step-by-Step: Cutting One Size Larger (From Size 7 to Size 8)
Follow this sequence when no grading machine is available:
- Cut the model pattern outline A–B–I as usual.
- Draw a construction line P parallel to and 1 inch (25.4 mm) away from the B–I line.
- On line P, mark the 1/12 inch (2.117 mm) grade for the quarter instep.
- From the base of the standard (X–S area), add 1/12 inch (2.117 mm) parallel to the existing line.
- Drop a perpendicular at S and add 5/24 inch (5.291 mm) total length grade.
- Mark the new back seam base curve S¹.
- Add 1/16 inch (1.588 mm) for back height and mark new top point T¹.
- Cut the new top line from ankle position E to T¹.
- Cut the back curve, aligning the model between T¹–S¹.
- Cut the instep curve from F to the 1/12 inch (2.117 mm) mark on line P, lowering the model to match ankle E on the larger pattern.
- Position the toe of the model at the new toe point A¹.
- Pivot the model from A¹ until the vamp wing meets the 1/12 inch (2.117 mm) addition at X — complete the vamp curve.
Pro Tip: When pivoting, use a fine awl or micro pin at point A¹ to prevent slippage. Trace lightly in pencil first, then ink only after verifying all alignments.
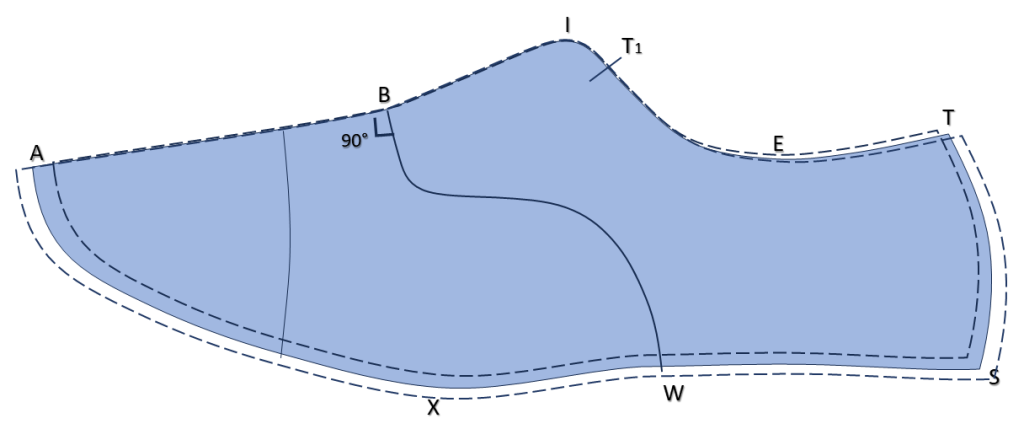
Testing the Accuracy of Your Grade
After grading, always verify correctness by superimposing patterns:
- Place model size and graded size together at the seat.
- Check increases:
- A–A¹ (overall length) = 1/8 inch (3.175 mm)
- T–T¹ (back height) = 1/16 inch (1.588 mm)
- AB–A¹B¹ lines =1/8 inch (3.175 mm) parallel grade
If any point deviates more than 1/64 inch (0.397 mm), re-check pivot points and grading tool measurements.


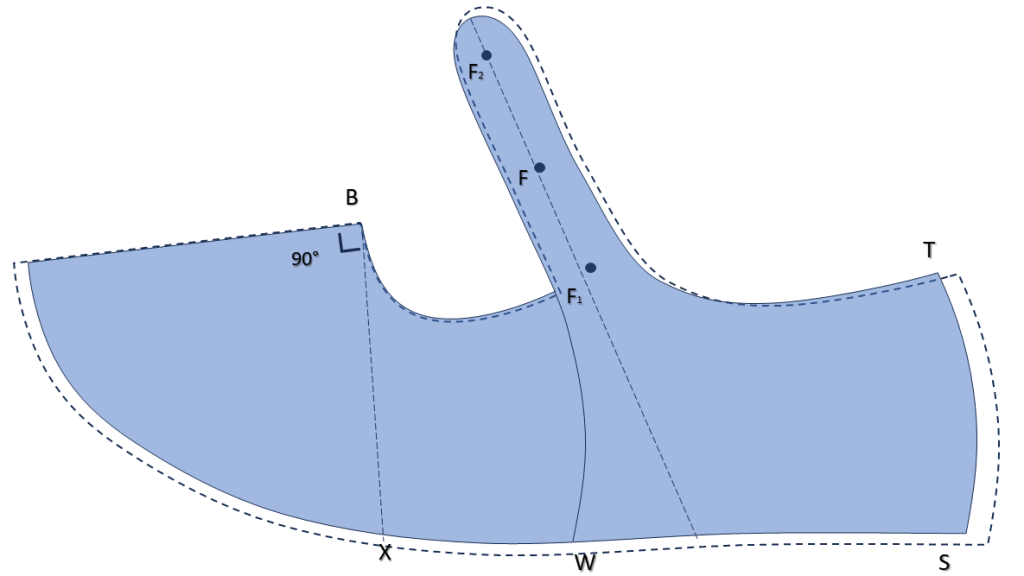
Special Cases: Ladies’ Court Shoes and 1-Bar Styles
Ladies’ court shoes (graded for fittings)
- Keep the golosh point T the same distance from the crease line in all fittings.
- Maintain identical back heights across fittings.
- Apply the full ⅛ inch (3.175 mm) grade only at the joint line.
Girls’ 1-bar pattern – one size larger
- Grade points B, A, X, and S normally.
- Measure from B to bar centre (F) with the grading tool to determine increase.
- Transfer the required amount as dotted guidelines.
- Keep bar width constant (restricted) across all sizes.
- Measure F to F² for bar length increase and connect smoothly to the top line.


Conclusion: Combining Speed, Accuracy, and Production Reality
This hand grading system has been refined over decades and produces patterns that align perfectly with machine-graded standards when the same increment rules are followed. Its greatest strength lies in flexibility: rapid single-size jumps for sampling, controlled restrictions for design integrity, and consistent balance across fittings without duplicating formes.
Whether you are grading a classic men’s Oxford, a minimalist ladies’ court, or a structured children’s bar shoe, the measurement-based method empowers pattern makers to work confidently and efficiently — even under tight deadlines.


Final Expert Advice
Keep a personal notebook of verified grade results for each last type and fitting range you work with. Over time, this reference becomes faster and more reliable than any digital tool for quick checks in the pattern room.