Footwear Pattern Grading Methods: Pantograph System and Hand Grading Principles in Pattern Engineering
Introduction
In footwear pattern engineering, grading plays a critical role in transforming a single approved base size into a complete commercial size range. Although modern factories rely heavily on digital grading systems, understanding traditional grading methods remains essential for pattern technicians and product developers.
Historically, grading was performed manually using mechanical tools such as the pantograph and radial grading systems. These techniques were developed based on geometric scaling, similar triangles, and controlled projection from grading centres. Even today, these principles form the foundation of computerized grading software.
This article explains pantograph construction, hand grading methodology, insole grading logic, and industrial accuracy requirements used in footwear manufacturing.
The Pantograph in Footwear Grading
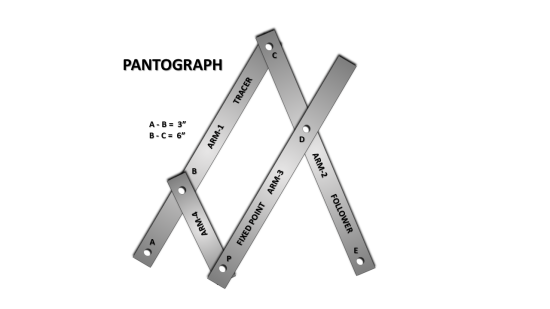
A pantograph is a mechanical device used to enlarge or reduce shapes proportionally. It operates through linked arms connected by pivot points, allowing controlled duplication of patterns at a fixed ratio.
Main Parts of a Pantograph
- Arm 1 — Tracer: Used to follow the original pattern outline.
- Arm 2 — Follower: Transfers movement proportionally.
- Arm 3 — Fixed Point (Hinge): Stabilizes the mechanism.
- Arm 4 — Projection Arm: Produces enlarged or reduced output.
When the tracer moves around a pattern, the follower reproduces the scaled version simultaneously.
Example Ratio (2 : 1 Enlargement)
- Distance A–B = 76 mm
- Distance B–C = 152 mm
This proportional relationship produces an enlargement ratio of two to one.


How to Make a Simple Pantograph
A basic pantograph can be constructed for training purposes using simple materials.
Construction Steps
- Cut rigid strips of card or thin board.
- Connect points B–C–D using paper clips or pivot pins.
- Create a pencil hole at point E.
- Secure fixed point P onto the clicking board.
- Trace the original shape using the tracer arm.
As tracing is performed, the enlarged pattern is automatically reproduced.
Importance of Hand Grading
Hand grading is considered essential for understanding grading geometry. Although it is time-consuming, it helps pattern engineers visualize how patterns expand across sizes.
In industrial production:
- Patterns are usually graded using computer systems.
- Specialized grading firms may perform bulk grading.
- However, manual grading is still required for quick fitting corrections or prototype evaluation.
When Hand Grading is Used
- Fit adjustment (+1 or −1 size)
- Sample development
- Design evaluation at extreme sizes
- Pattern troubleshooting
Accuracy Requirements
- A 4H sharp pencil should be used.
- Measurements must be transferred precisely.
- Radial projections must remain consistent.
Fundamental Insole Grading Measurements
Insole grading follows standardized proportional increments.
Length Increment
- Size-to-size length difference = 8.46 mm
Width Increment
- Tread width increase = 2.1 mm
- Seat width increase = 1.6 mm
These proportions ensure that width growth remains balanced relative to length expansion.
Understanding Tread Width Relationship
The width variation between sizes equals approximately one-quarter of the length increase.
Key Relationships
- Length increase per size = 8.46 mm
- Tread width increase = 2.1 mm
- Width progression follows proportional scaling rather than equal expansion.
This prevents excessive widening that could affect fit and appearance.
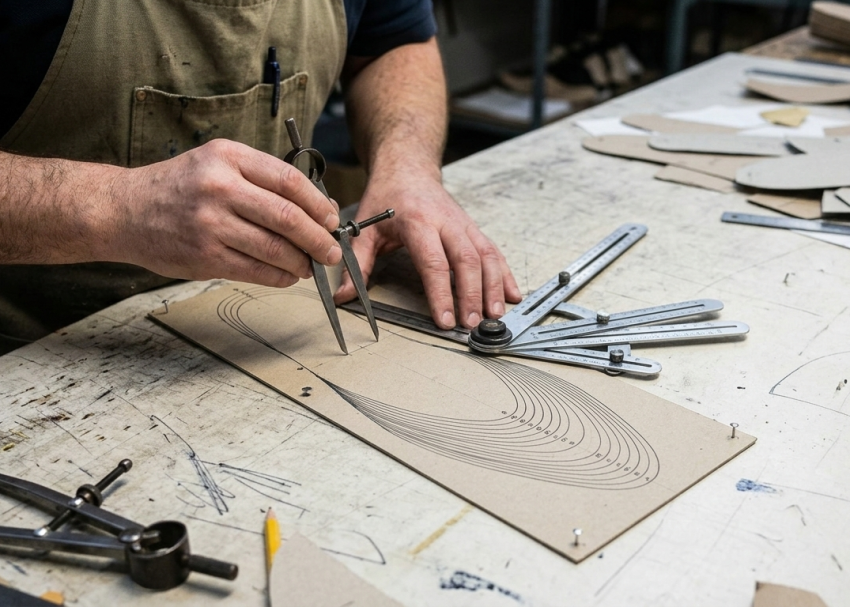
Creating the Radial Tool
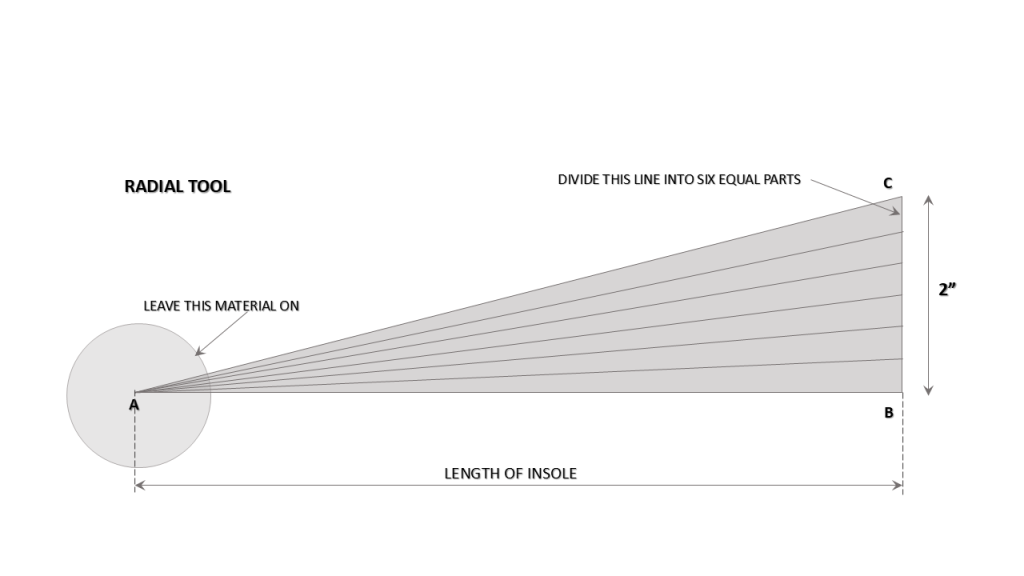
The radial tool allows accurate projection of grading increments.
Construction Method
- Measure insole length from toe centre to seat point.
- Draw line A–B on stiff card.
- At point B, draw a perpendicular line.
- Divide into six equal sections (6 × 8.46 mm = 51 mm total).
- Connect divisions back to point A.
- Cut the shape, leaving a bulb section at point A.
The bulb section becomes the pivot during grading.
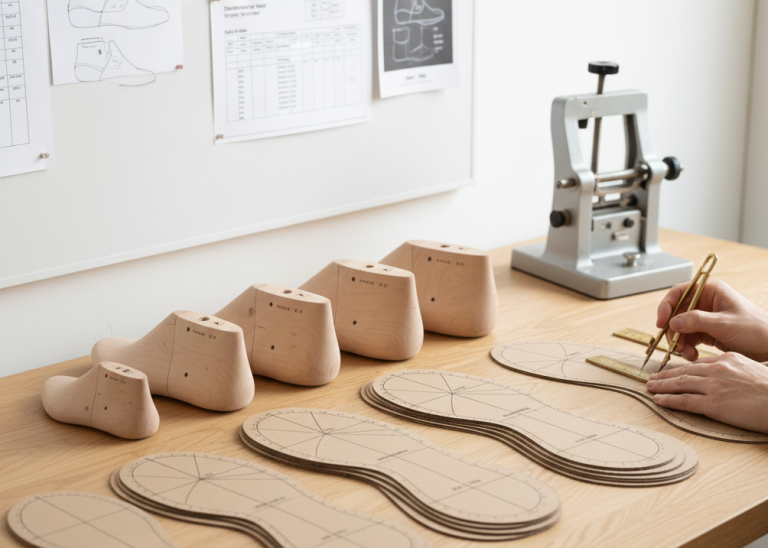
Preparing the Insole Pattern
Before grading begins, reference lines must be established.
Required Markings
- X–Y Line: Centre line from toe to seat.
- C–D Line: Widest tread point perpendicular to X–Y.
- Length measurement printed along X–Y.
- Width measurement printed at tread.
These references ensure grading symmetry.
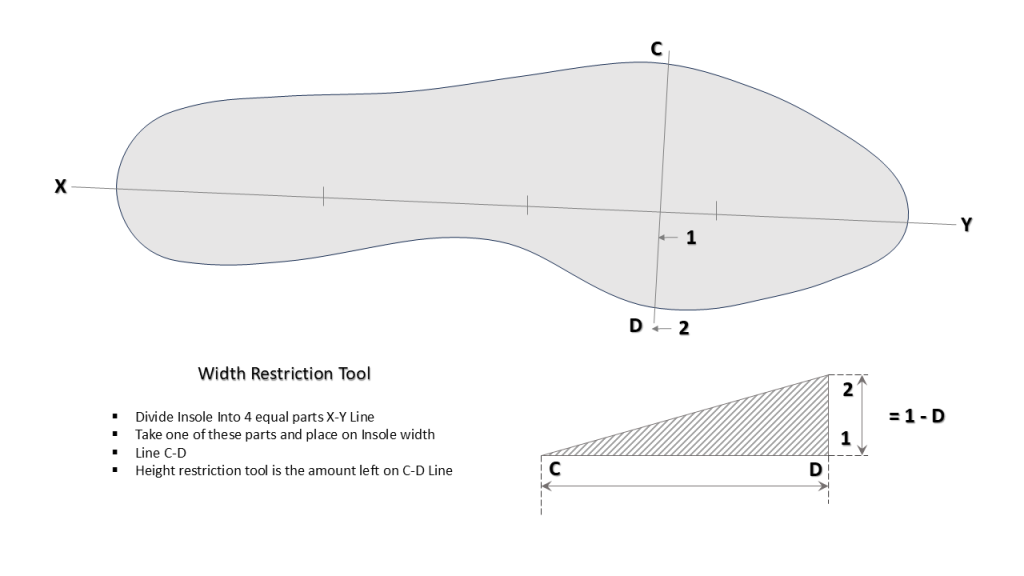
Constructing the Width Restriction Tool
The restriction tool controls width growth.
Tool Dimensions
- Tool length = widest tread measurement (C–D).
- Tool width = difference between:
- ¼ insole length
- Tread width measurement
This tool prevents uncontrolled expansion during grading.
Grading Insole and Outsole Patterns
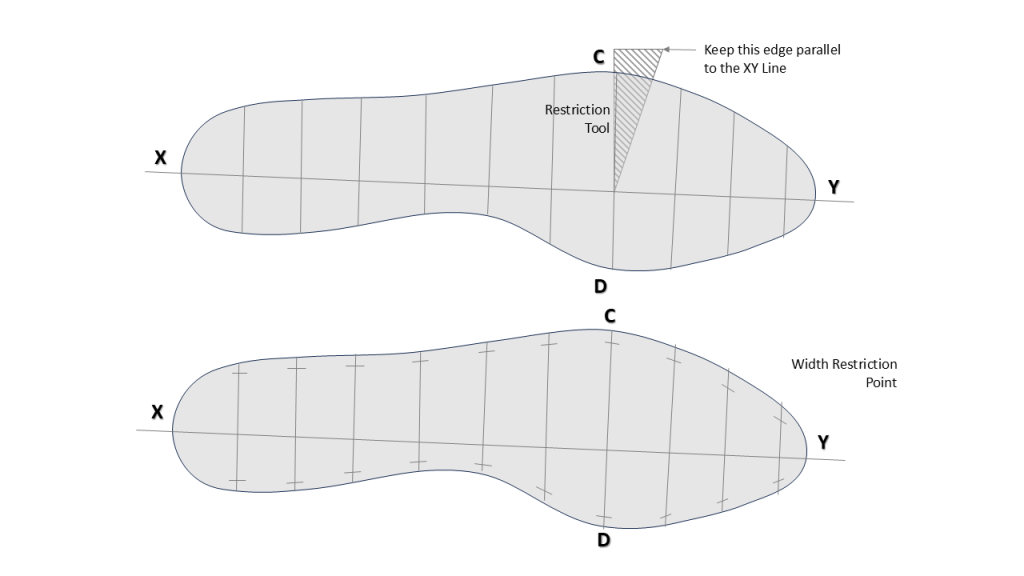
Grading is performed using restriction points and radial projection.
Procedure
- Draw multiple perpendicular lines to X–Y (about 12 lines).
- Add more lines where curves are sharper.
- Place restriction tool with point C on X–Y line.
- Transfer measurements using dividers.
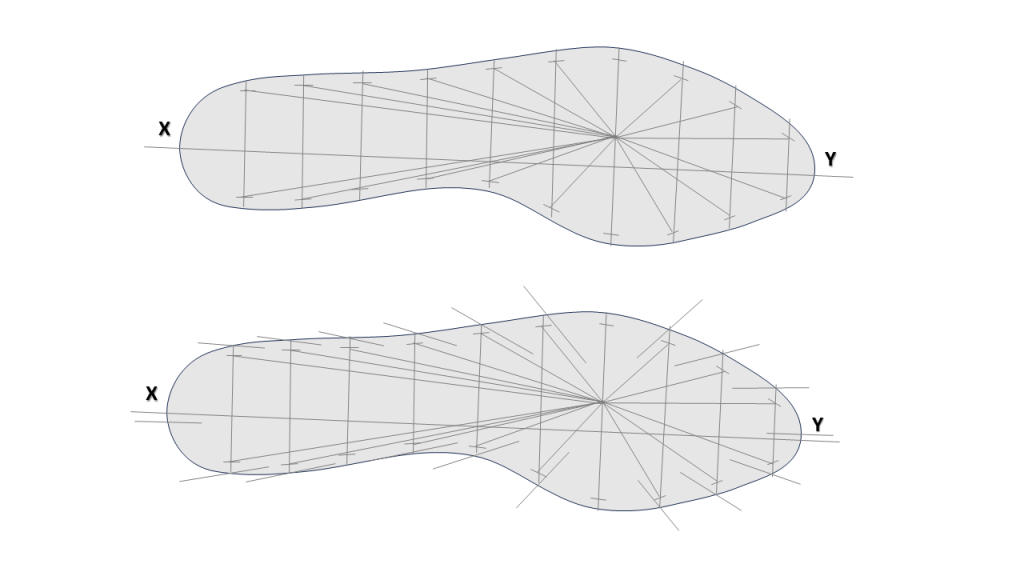
- Select a grading centre (commonly X–Y and C–D intersection).
- Draw radial lines to restriction points.
- Create parallel grading lines around pattern edges.
The radial tool is then rotated around the grading centre to transfer increments.
Building the Full Size Range
Once grading points are established:
- Place paper under the pattern.
- Mark one size up or down.
- Join transferred points smoothly.
- Repeat progressively to create the full size range.
Accuracy Check
Example verification:
- Difference between Size 8 and Size 11:
- Length difference ≈ 25.5 mm
- Width difference ≈ 6.3 mm
If values match, grading accuracy is confirmed.
Expert Tips (Industry Practice)
✅ Always validate grading using the last bottom rather than pattern only.
✅ Increase grading lines in high curvature zones like toe spring.
✅ Maintain parallelism with centre lines to avoid twisting.
✅ Recheck tread width after grading large size ranges.


Pro Tips for Pattern Engineers
- Select grading centers carefully — incorrect centers cause distortion.
- Avoid excessive width grading in fashion footwear.
- Use hand grading periodically to train junior technicians.
- Always cross-check outsole compatibility after grading.
Common Grading Mistakes to Avoid
- Uneven radial projection
- Incorrect width proportion
- Misaligned centre lines
- Over-grading toe area
- Ignoring last geometry


Conclusion
Although digital grading dominates modern footwear manufacturing, traditional pantograph and hand grading methods remain the backbone of grading science. These systems teach proportional control, geometric scaling, and pattern behavior across sizes.
By mastering these principles, pattern engineers can ensure consistent fit, structural integrity, and manufacturing efficiency across the entire footwear size range.