The Art of Manual Shoe Pattern Making: A Timeless Craft
Manual shoe pattern making is a hands-on craft that transforms a 3D shoe last into flat, sewable components. This traditional method, blending artistry with precision, is perfect for bespoke designs and prototyping. While digital CAD pattern making is gaining traction (stay tuned for our upcoming blog on that topic!), manual techniques remain essential for their tactile control and accessibility. Below, we dive into the core technique, tools, stages, and a step-by-step flowchart to guide you through this timeless process.

Why Manual Pattern Making Matters
Manual methods offer unmatched control, allowing artisans to “feel” the last’s contours. Ideally suited for small-batch or custom shoes, they’re intuitive, forgiving, and require minimal setup. However, despite advancements in digital tools, manual skills remain indispensable for prototyping and bespoke craftsmanship, grounding shoemakers in the essence of their craft.

Key Technique: Tape Method
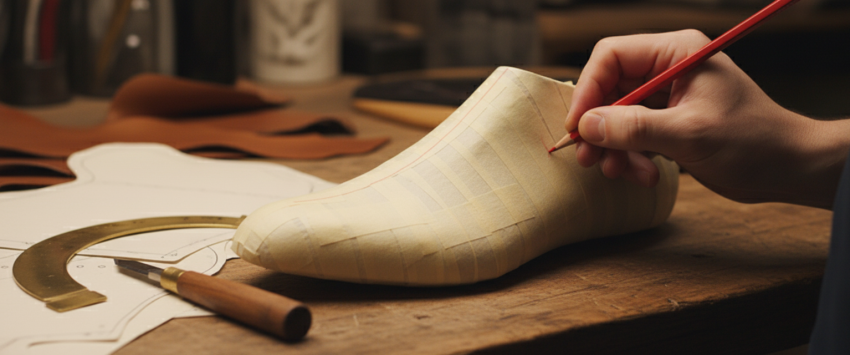
The tape method is the go-to for most shoemakers, letting you see the design take shape directly on the last.
Steps
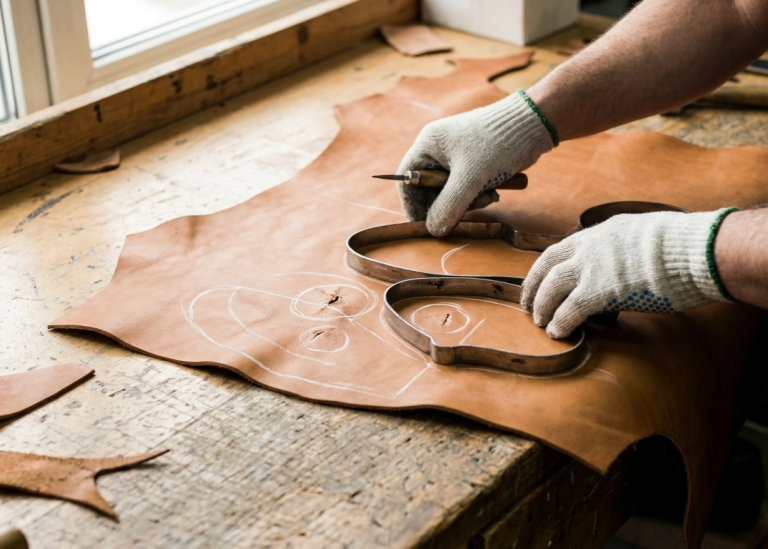
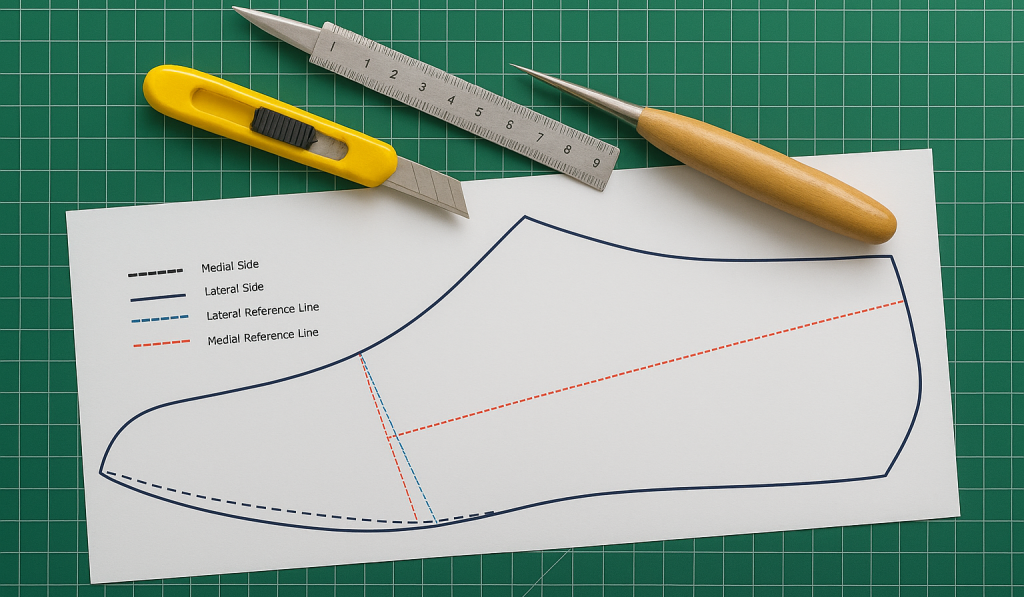
- Cover the last with masking tape, overlapping strips by 50% from toe to heel, ensuring no bubbles.
- Mark key points: vamp and heel centerlines, ball point, instep, heel curve, and feather edge.
- Sketch style lines on the lateral side for design proportions.
- Cut tape from heel to toe, peel off, and flatten onto pattern paper.
Advantage
- Direct interaction with the last’s shape.
- Additionally, ideal for complex upper designs.
- Furthermore, beginner-friendly with practice.

Core Stages of Manual Pattern Making
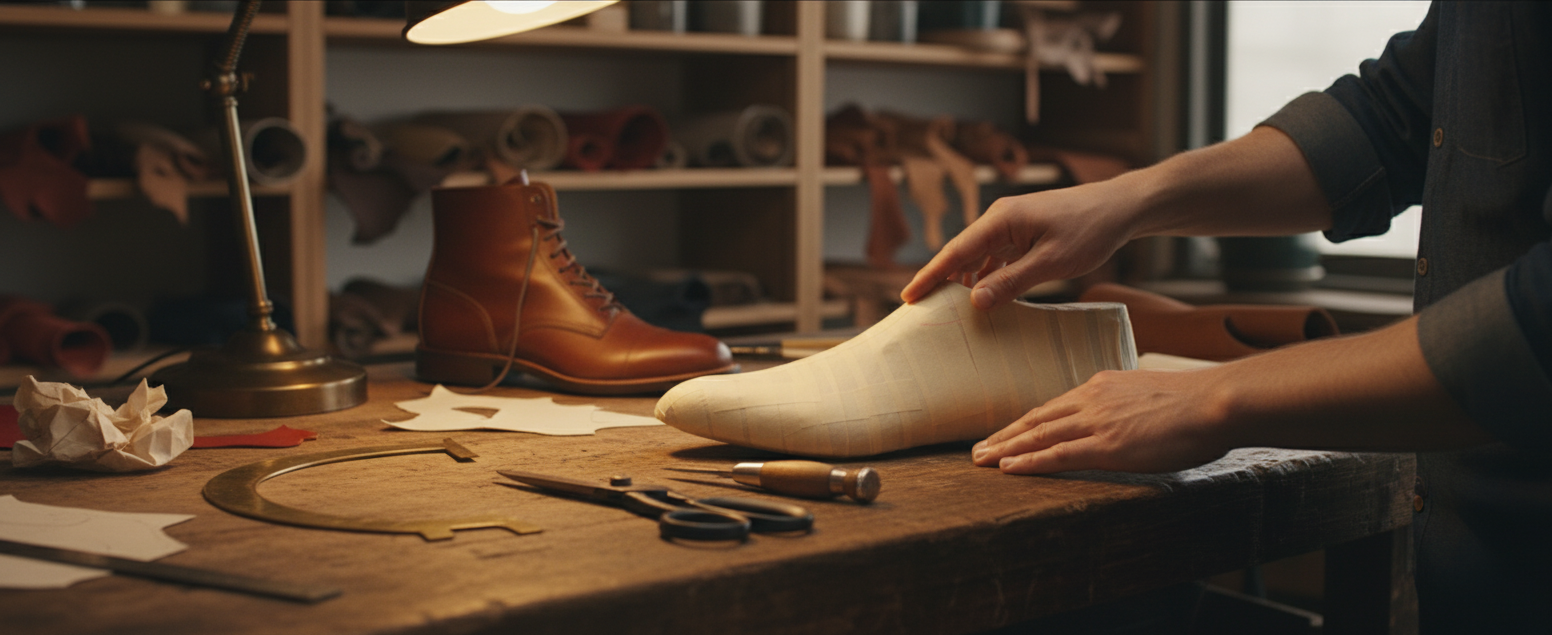
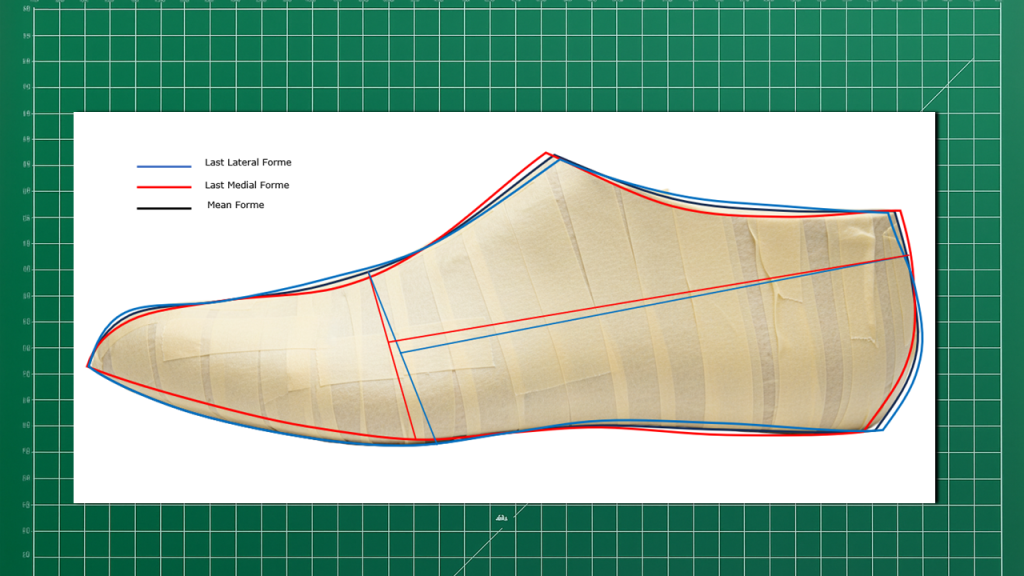
1. Mean Form: The 2D Blueprint
The foundation for all patterns, capturing the last’s geometry.
How It’s Made:
- Tape, mark, and flatten both lateral and medial sides.
- Overlay and average them to create the mean form.
Purpose:
- Ensures fit accuracy across sizes.
- Base for all subsequent patterns.

2. Shell/Standard Pattern: The Master Template
The full upper before styling, ready for production.
How It’s Made:
- Trace from the mean form, refining style lines.
- Add material-specific allowances (e.g., leather seams).
- Stencil upper, lining, and reinforcement lines.
Purpose:
- Enables size grading and consistent assembly.
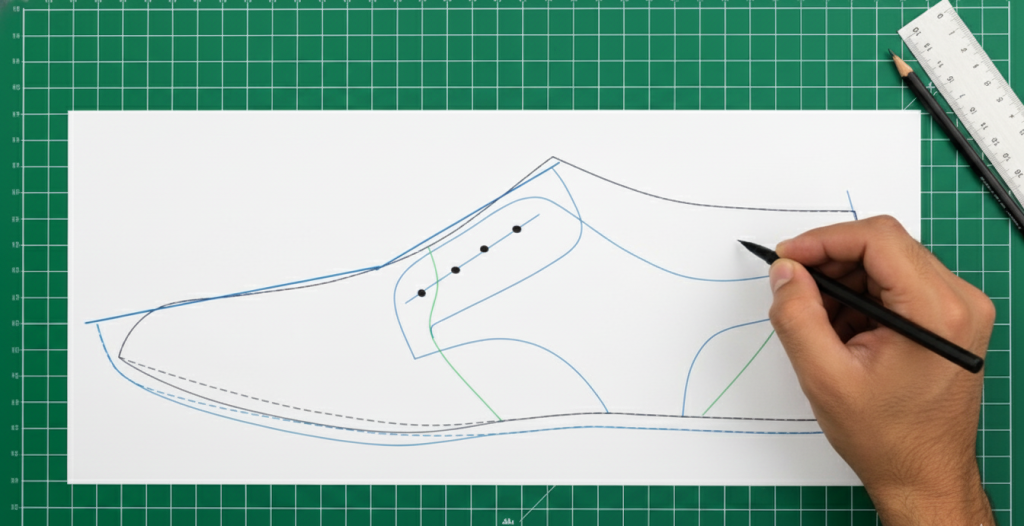
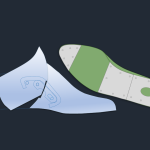
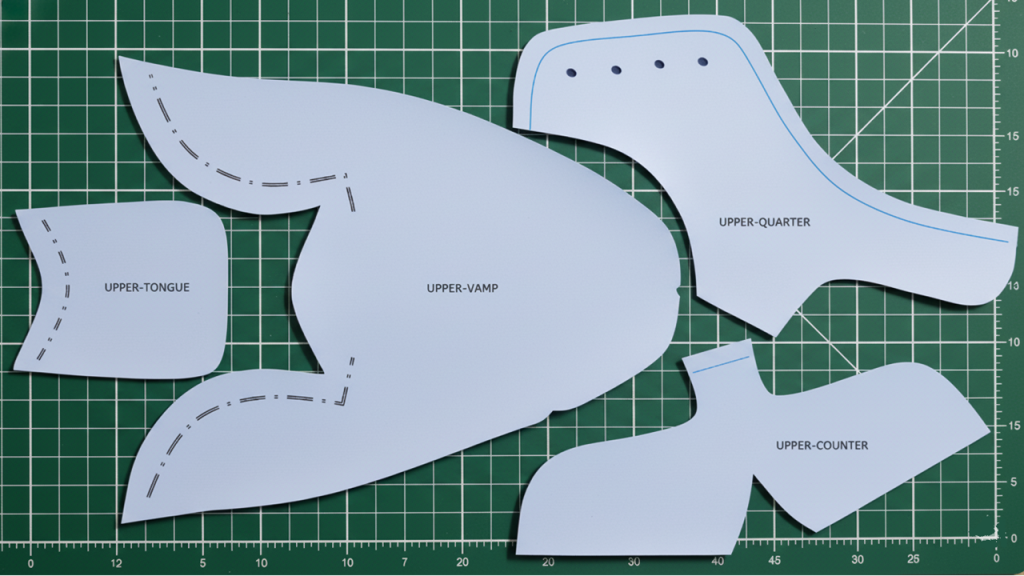
3. Upper Patterns: The Design Stars
Components like vamp, quarters, tongue, and heel counter.
How They’re Made:
- Cut from the shell along style lines.
- Add seams, notches, and punches; label clearly.
Purpose:
- Defines the shoe’s look and structure.

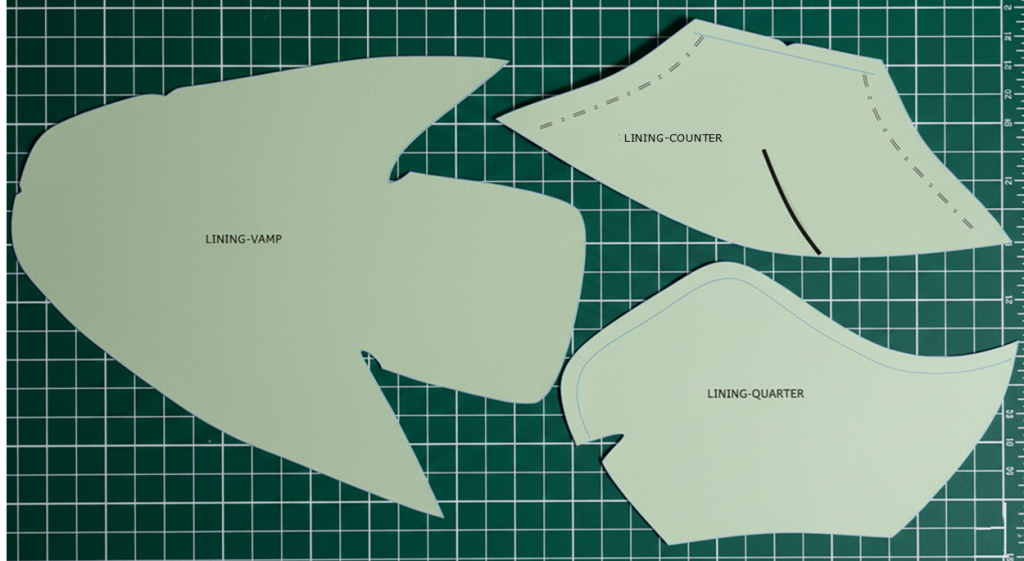
4. Lining Patterns: Comfort and Strength
Internal layers for durability and fit.
How They’re Made:
- Adjust upper patterns for internal fit, tweaking seams.
- Add operational allowances.
Purpose:
- Enhances comfort and reinforces stress points.
Flowchart: Manual Pattern Making Process
Steps:
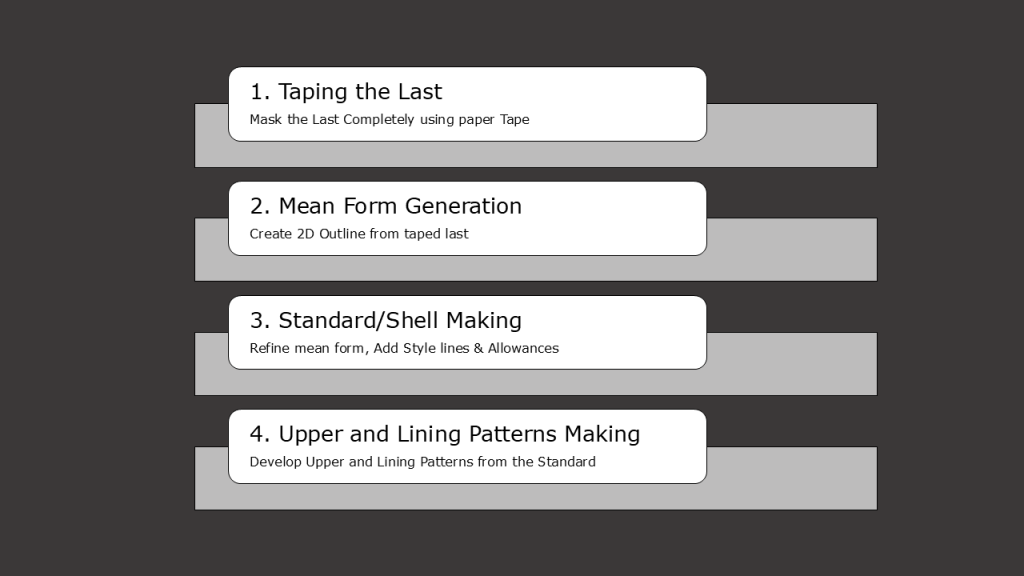
- Taping the Last: Cover the last with masking tape and mark key reference points.
- Mean Form Generation: Flatten taped outlines, overlay lateral and medial sides, and create the mean form
- Standard/Shell Pattern Making: Trace the mean form, add allowances, and create the master template.
- Upper and Lining Pattern Making: Cut upper components, adjust for linings, and add seams/notches
Why Choose Manual?
Manual pattern making shines for its low cost and flexibility, making it ideal for bespoke shoes or one-off prototypes. As one expert notes, “Traditional pattern making knowledge is essential even in digital workflows.” Moreover, it’s a craft that connects you directly to the last, fostering creativity and precision.
Conclusion
Manual shoe pattern making is a rewarding craft that blends tradition with creativity. By mastering the tape method and its stages, you can create bespoke shoes with precision and personality. Whether you’re a beginner or a seasoned artisan, this process offers a hands-on connection to shoemaking that’s hard to replicate. Want to explore digital CAD pattern making? Stay tuned for our next blog!